

Users of Windows 7, 8 or Windows Server 2008 (excluding R2) should take some extra actions to perform whole system cloud backup with MSP360 Backup to be able to do a bare-metal restore.
Windows Server 2008 R2 or higher
While using MSP360 Backup with Windows Server 2008 R2 for system state backup or bare metal restore you need to specify the interim storage location for the software to put backup files that will then be uploaded to the cloud. As interim storage, you can use logical drive or network share.
When choosing an interim storage location, it’s important to understand that actual backup is performed by an operation system that can’t do cloud backup. That’s why MSP360 software for Windows Server backup initiates native Windows backup for system state and bare-metal restore points OS to the on-premise storage location. When system backup is finished, MSP360 Backup takes data to the cloud.
Windows 7 and 8, Windows Server 2008
System backup for Windows 7, 8 and Windows Server 2008 operating systems can be done similarly but with some restrictions and manual actions.
First, system state backup is not available for Windows 7 and Windows 8, only whole system backup with all the files and user data can be done.
Second, you will need to manually create a backup script for bare-metal restore (see the example later in the post). Backup logic will be the same as with Windows Server 2008R2: local backup followed by cloud backup. Below is the step by step guide for Windows 7 backup for bare-metal restore.
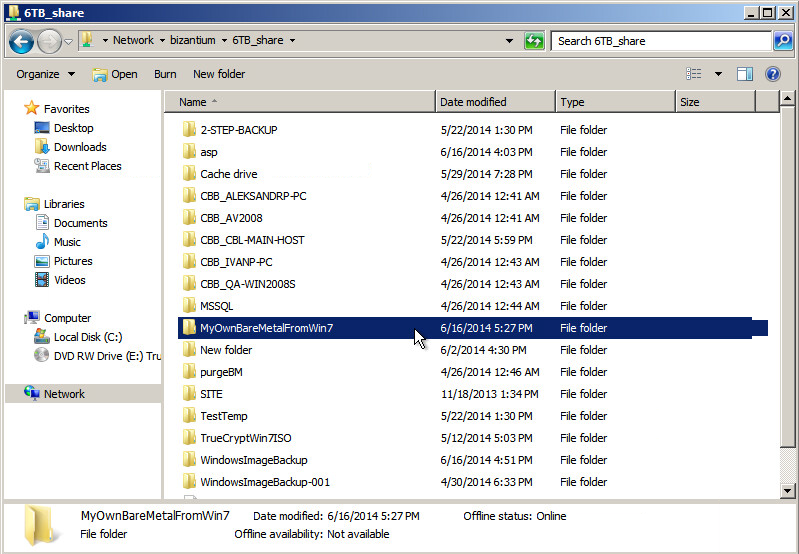
Step 1. Choose interim storage and create a folder for your backup files. In our case, we use the network share folder.
Step 2. Create a script to run by a system. It’s very simple: one line with parameters for WBADMIN utility.
WBADMIN START BACKUP -backupTarget:storage -allCritical -user:username -password:password -quiet
where:
- storage – backup destination. Specifies a path to the folder you’ve created in Step 1. Parameter requires a hard disk drive letter (for example, F:), a volume GUID-based path in the format of \\?\Volume{GUID}, or a Universal Naming Convention (UNC) path to a remote shared folder (\\<servername>\<sharename>\). By default, the backup will be saved to: \\<servername> \<sharename>\WindowsImageBackup\<ComputerBackedUp>\>
Important: when the same remote shared folder is used as interim storage, every next backup overwrites the previous one. - user – if the backup is saved to a remote shared folder, this parameter specifies user name with write permission to the folder.
- password – this parameter specifies the password for the user name that is provided by the –user parameter.
- -allCritical - creates a backup that includes all critical volumes (operating system files and components).
- -quiet - runs the command with no prompts to the user.
These parameters are enough to execute a standard bare-metal backup. In our case the script is:
WBADMIN START BACKUP -backupTarget:\\bizantium\6TB_share\MyOwnBareMetalFromWin7 -allCritical -user:CloudBerryDomain\asp -password:VfifDfhbnDfhtymt7001 -quiet
Put your values to create a windows batch file containing this line. You will need this file later at the backup plan creation. In our example it is MyOwnBareMetalFromWin7.bat.
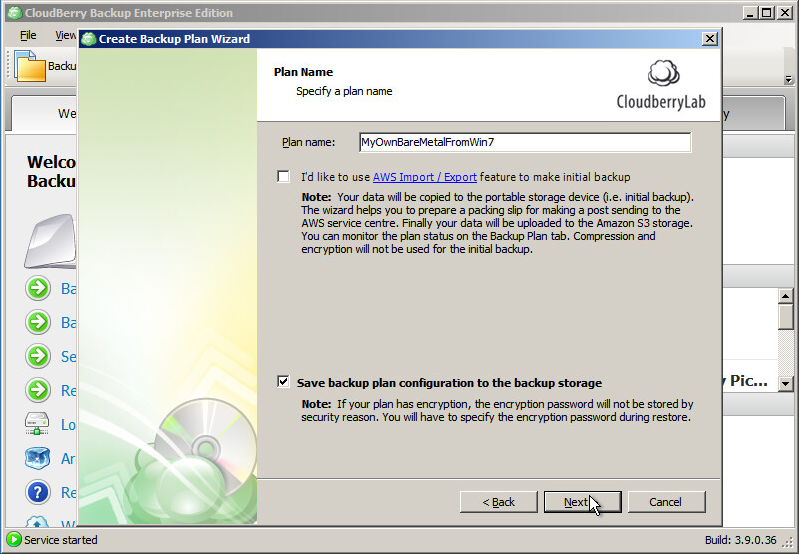
Step 3. Launch MSP360 Backup then click on the "Backup Files" button in the top menu.

Step 4. Name your backup plan.
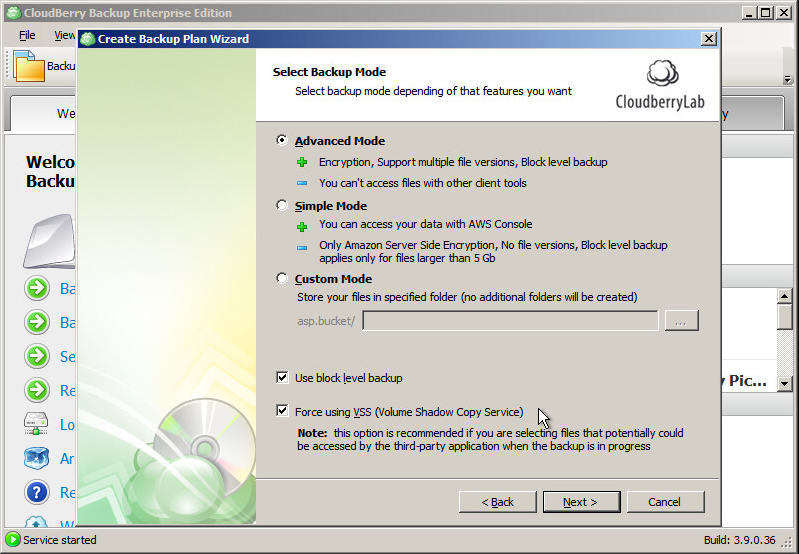
Step 5. Select Backup Mode. Here we can advise choosing Block Level Backup and VSS because MSP360 Backup will be backing up big files.
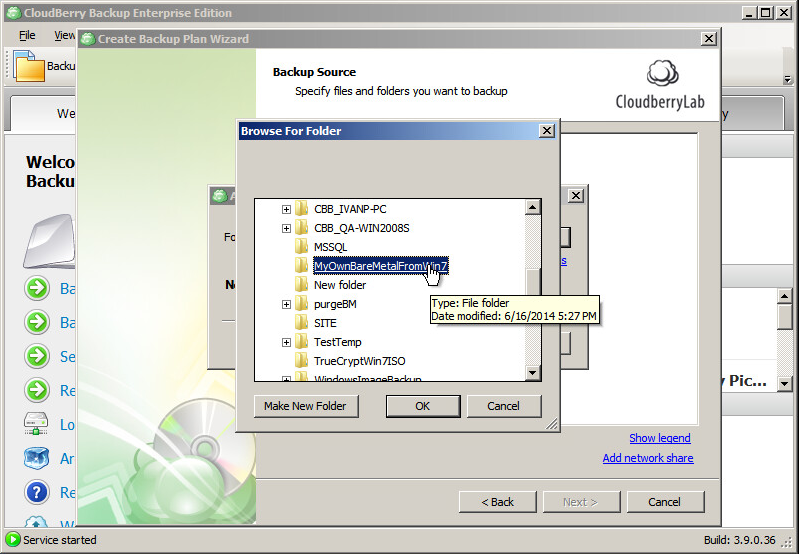
Step 6. Specify Backup Source. Here you need to choose the folder created in Step 1. If it is a network share, don't forget to specify credentials to access.
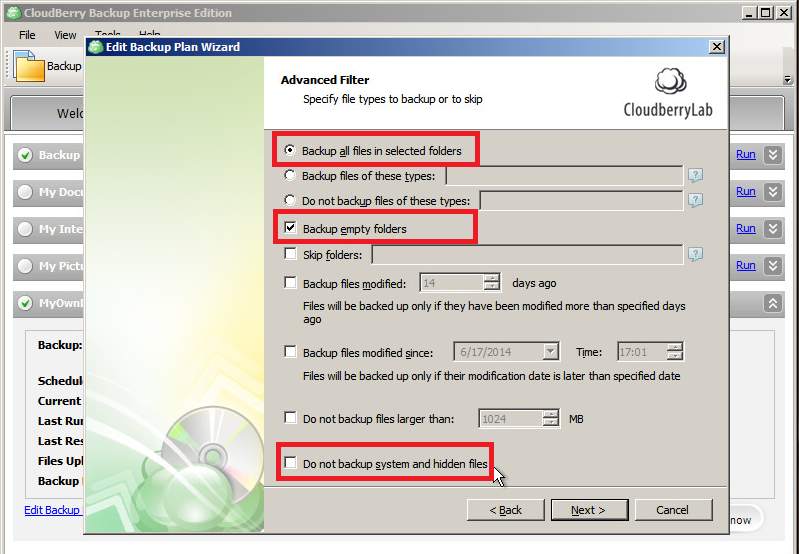
Step 7. The following step can be important: we doing a backup of almost unknown content, and it is important to restore it exactly as was. Therefore we strongly recommended to include into the backup empty folders and hidden/system files. There shouldn’t be such files in the bare metal backup, but just in case it would be better to perform these actions.
Step 8. Specify the compression, encryption, SSE and RRS, purge and schedule options, full backup schedule.
Step 9. On the Pre/Post Actions step, you need to specify the BAT file created in Step 2. It will be executed before the backup of data will begin.
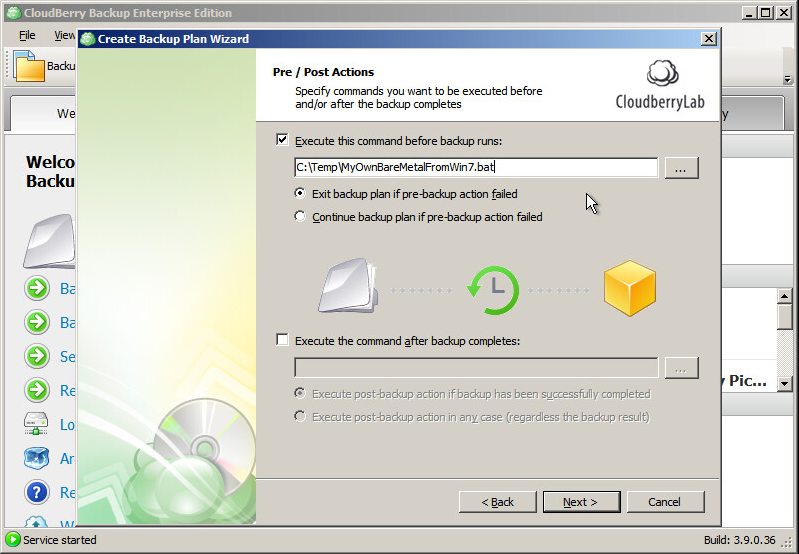
Note: if you don't want to store results of an intermediate step of bare metal backup, you can create the BAT file that will delete these files. Specify it in the Post Actions field and your files will be deleted from interim storage when cloud backup is done.
Step 10. Specify notifications options then review and save the backup plan.
Summary
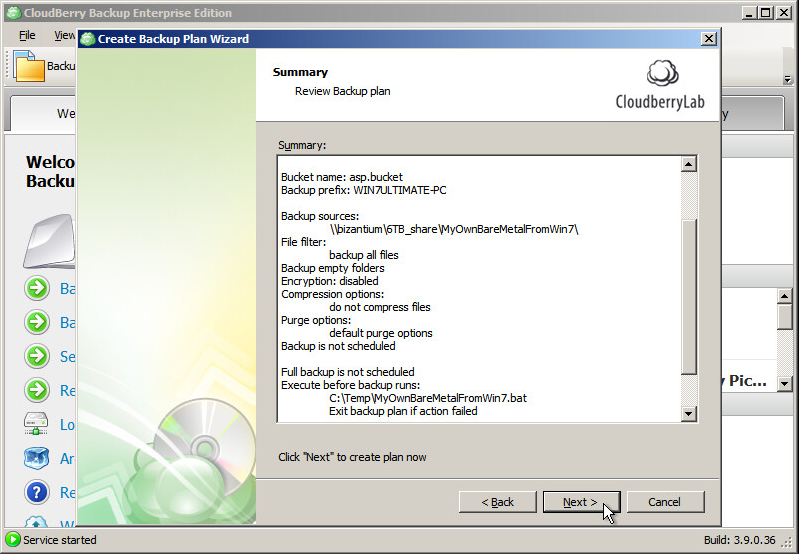
We created a local folder for interim backup storage. We also created the BAT file with a script to start the WBADMIN utility. We created a backup plan in MSP360 Backup to move backups to the cloud. Thus, we created the backup plan that will automatically run to put backup for bare-metal restore to the cloud.
Note: You can skip Pre/Post Actions and interim folder steps, if you manually execute the command for WBADMIN, and then specify the folder with bare-metal data at plan creation in MSP360 Backup.