


This post explains how to configure MSP360 Drive to mount your Microsoft Azure account as a network drive to your Windows computer. With MSP360 Drive you can work with files in Microsoft Azure directly from the Windows Explorer interface, the same way as if they were on your local drive.
Mounting your Microsoft Azure account as a network drive to a computer is a two-step process: you first need to add Microsoft Azure account to MSP360 Drive and after that just use MSP360 Drive to mount this account to your computer.
Sign Up for Microsoft Azure
Please, find a step-by-step instruction on how to sign up for Microsoft Azure cloud storage in the following article: How to Get Started with Microsoft Azure
Adding Microsoft Azure Account to MSP360 Drive
1. Navigate on the Drive icon in the system tray.
2. Choose Options.
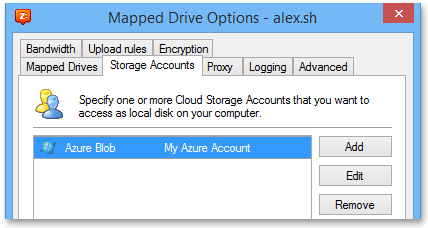
3. Switch to the Storage Account tab and click Add.
4. Select Microsoft Azure from the Storage Provider drop-down list, type a name for your account and specify Microsoft Azure access keys. Then hit OK.
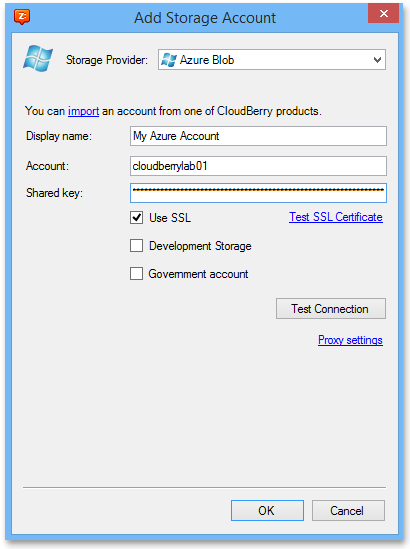
Note: To get your Microsoft Azure access keys, you can refer to our blog: How to Find Microsoft Azure Access Keys
5. You will see your Microsoft Azure account displayed in the list of accounts.
Now your Microsoft Azure account has been successfully added to MSP360 Drive. Follow the instructions below to mount this account as a network drive to your computer.
Mounting Microsoft Azure Account as Network Drive to Windows Computer
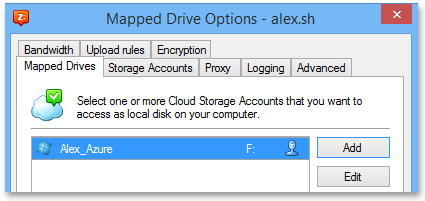
1. In the MSP360 Drive Options, switch to Mapped Drives tab and click Add.
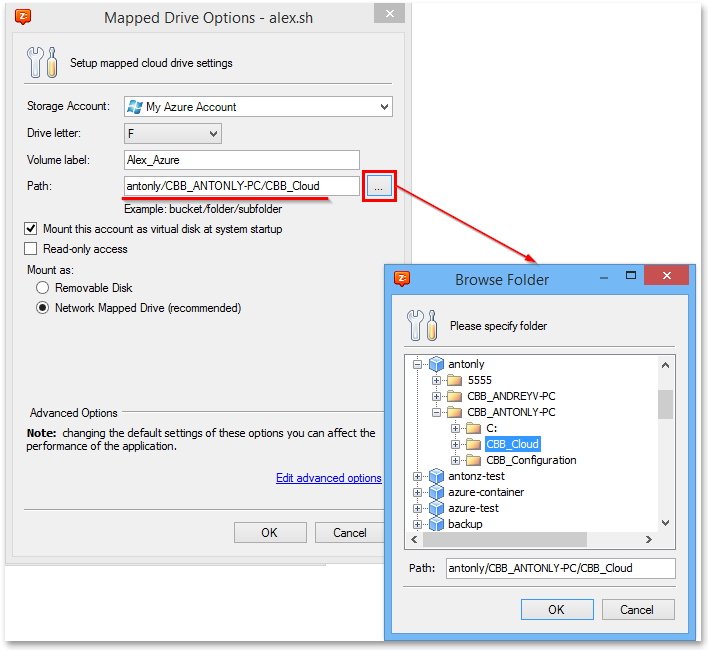
2. From the "Storage Account" drop-down menu, select the Microsoft Azure account you want to mount and specify the rest cloud drive settings. In the Path field, click Browse button to specify the full path to the Microsoft Azure storage bucket.
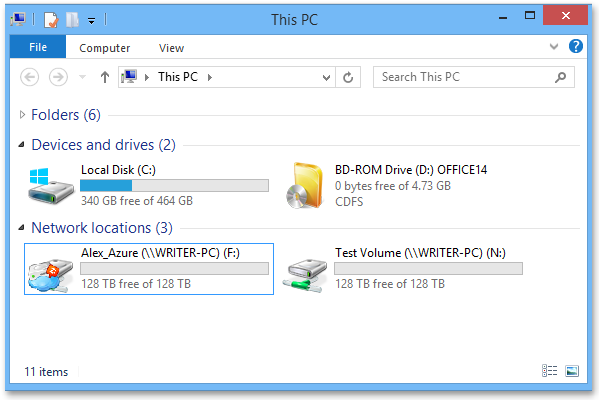
3. You will see your Microsoft Azure account in the list of mounted drives.
4. Finally, reboot your computer. Now you can access Microsoft Azure directly from Windows Explorer and/or other applications.
Conclusion
Using MSP360 Drive, you can mount your Microsoft Azure account as a network drive to your Windows computer and use it just like any other hard drive. You can drag and drop files to it and they will be instantly saved in the cloud. The 15-day fully functional trial version of MSP360 Drive for Microsoft Azure is available absolutely for free. Just download our product and check if it meets your needs and requirements.


with Microsoft Azure and MSP360 Backup
- Get acquainted with Azure Archive Blob Storage Tier
- Learn about MSP360 Backup features and benefits
- Explore the advantage of Azure Archive Storage tier and Azure VMs for disaster recovery with MSP360 Backup