CloudBerry Backup for macOS & Linux beholds yet another release that brings a plethora of new features that expand users' security settings and ways of interacting with the app. In this article, we break down each feature at length.
Web interface
The usual way of interacting with CloudBerry Backup conflates GUI and terminal. Naturally, many Linux distributions do not support GUI and can only be interacted with using the terminal. While CloudBerry Backup provides a full range of terminal commands for configuring, scheduling, and executing backup and restore plans, it is indeed a time-consuming effort, and GUI indisputably provides for the more efficient and convenient process. With that in mind, we are introducing a web interface for CloudBerry Backup, which now complements the CLI & GUI. The most common use-case for the novelty, we envision, will be connecting to a terminal-based Linux distribution from any device with a browser.
Now let's look proceed to set up and configure the web interface. The web interface is enabled by default and can be accessed right from any web browser. Go to localhost:43210 if you attempt to access the web interface from the machine itself. Conversely, if you're using a different machine to log on, go to ipaddress:43210 (usually looks something like 192.168.0.0:43210). The default port is 43210; however, you can change it later in the settings.
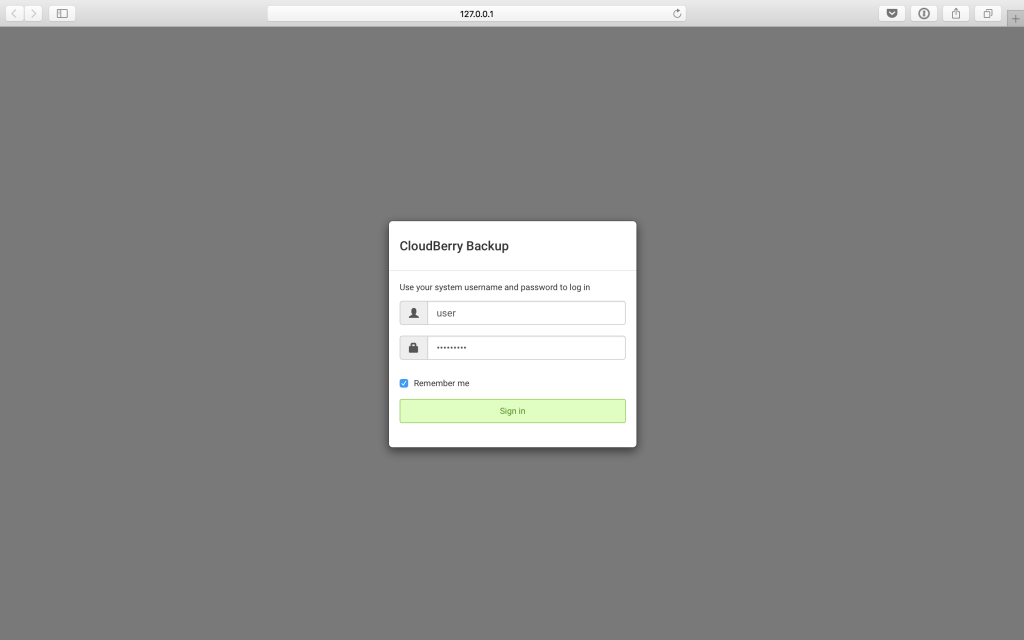
Enter your system username and password, optionally select the Remember me checkbox, and click Sign In.

Here you see the web interface that fully mimics the functionality of the GUI. You can configure and execute backup and restore plans, look through your files on backup destinations, and configure the web access settings.
That is to say, you can enable HTTPS connection and even force it to be the only type of permitted connection. Further, you can change the preferred ports for HTTP and HTTPS connections. Needless to say, your firewall should not block these ports from external access.
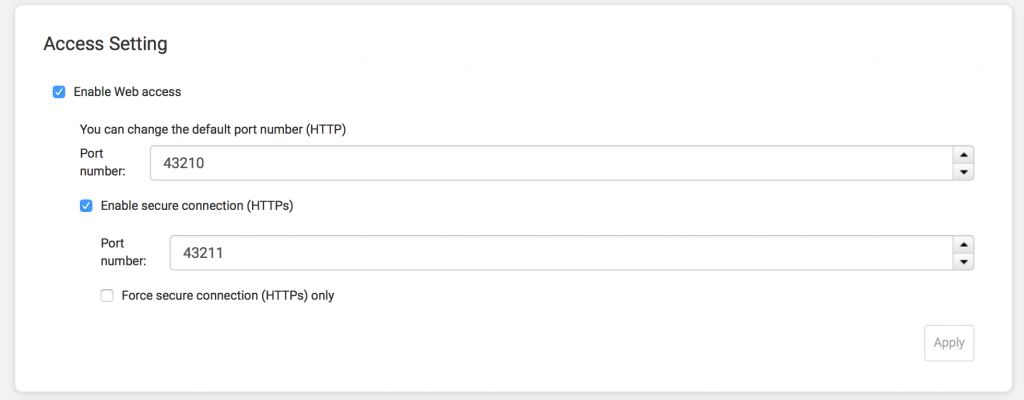
If you've enabled HTTPS connections, the web interface will consequently be available at https://192.168.0.0:43211 (or whatever your IP-address and specified ports are).
We truly hope that the web interface will prove to be useful and indispensable to many of our Linux-based customers who indeed rely heavily on CLI. Your feedback will be appreciated.
Full support for macOS High Sierra
CloudBerry Backup 2.1 is fully equipped to work with the latest iteration of macOS — High Sierra. So when you head over to the Mac App Store in two weeks to install Apple's latest operating system, you can be sure that our backup product will function properly and without any hiccups. We've ensured that CloudBerry Backup 2.1 is entirely compatible with Apple File System, thus enabling you to take advantage of the superior file system while retaining the ability to perform flexible backups.
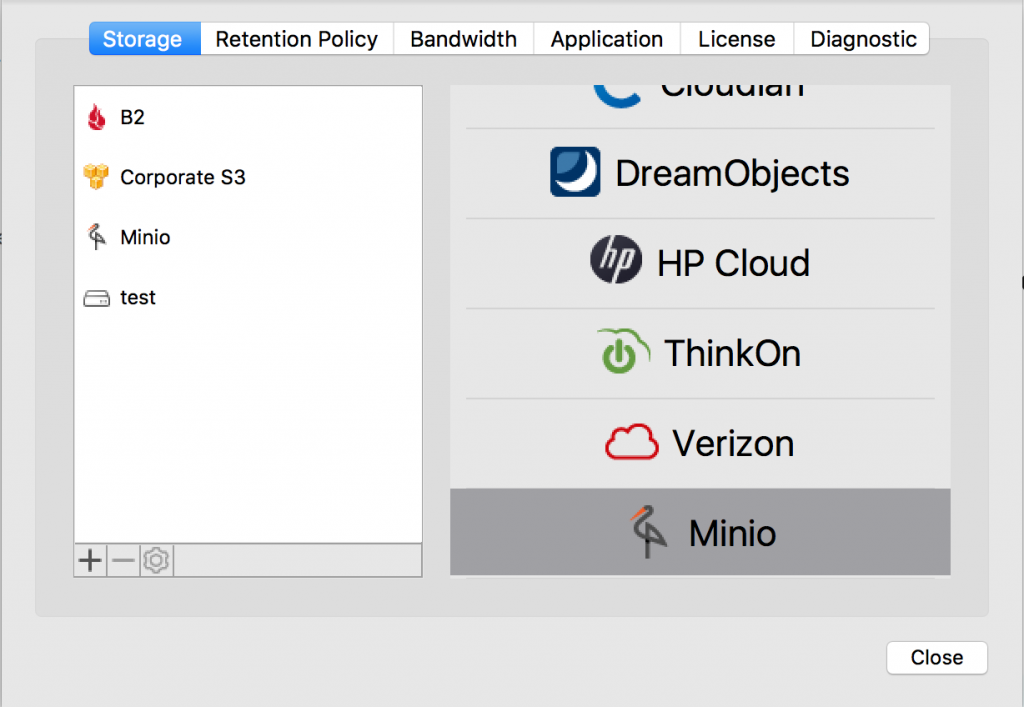
Support for Minio
Minio is an S3-compatible distributed object storage built for a cloud application. It is available free of charge, released under Apache license v2.0. Yet what sets apart Minio from the competitors the most is unquestionably its simplicity and effortless deployment. Being an open-source project, Minio has an active developer and user community. In CloudBerry Backup 2.1 we have implemented the support for Minio. And what's great is that you can easily deploy this storage to any of your servers or computers and immediately start backups via CloudBerry Backup. As usual, the cloud storage can be added in the settings, under Storage.
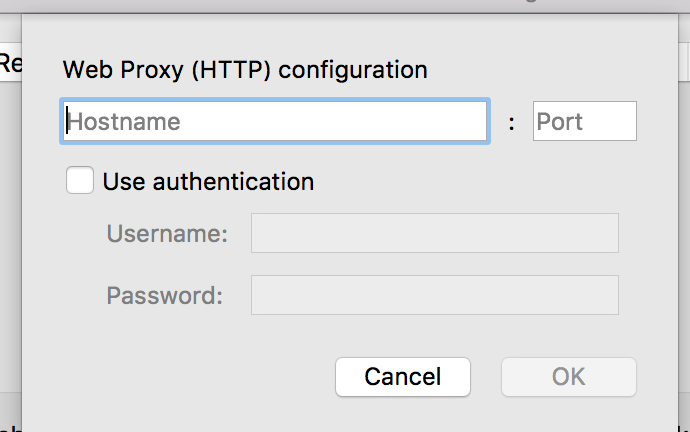
Support for Proxy
Another new feature in the latest edition of CloudBerry Backup is the support for web proxy. The feature is pretty self-explanatory; it allows you to shield all your incoming and outgoing connections with a web proxy. It can be enabled in the settings. Under Application, select the Use Web Proxy (HTTP) checkbox.

Then specify the proxy's credentials, click OK, and you're pretty much all set.
Removal of files from the Cloud
The last feature we'd like to briefly touch upon is the ability to remove files from the cloud within the app. Simply right-click on any file in Backup Storage and click Delete.
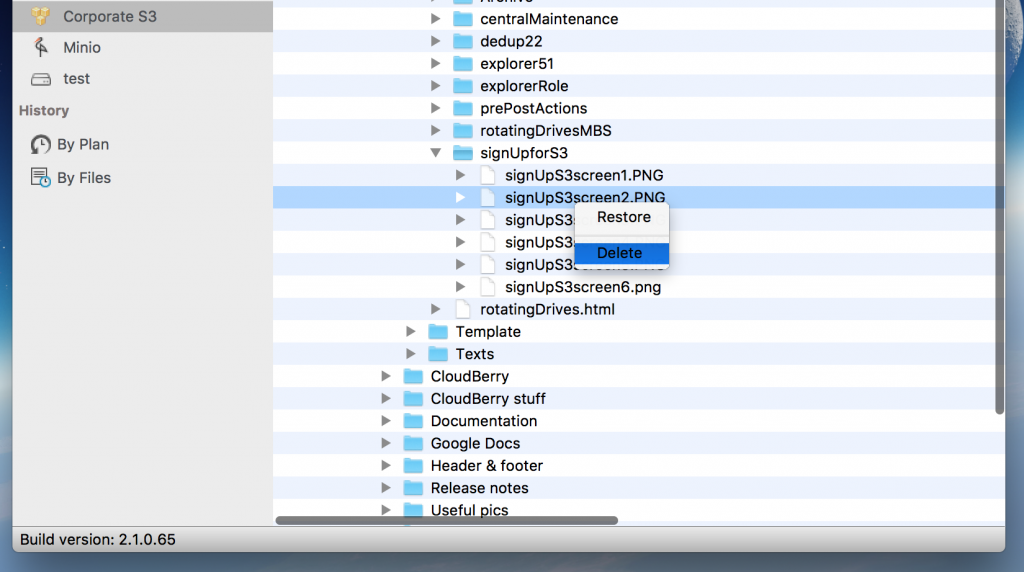
The deletion of files works across all supported storage services — cloud and local alike.
Support for S3-to-Glacier data transfer
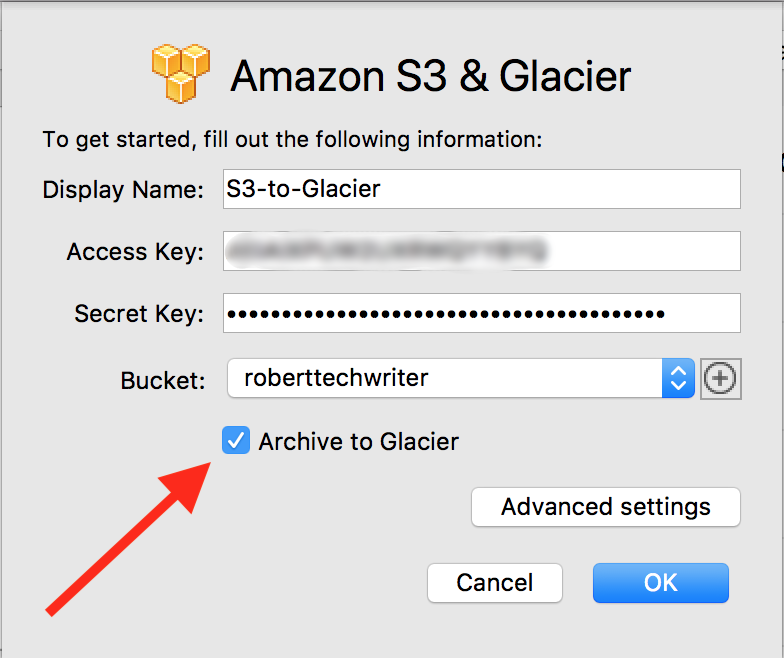
In release 2.1 we've brought you the option to transfer your data from S3 to Glacier immediately after upload. In other words, your data is first uploaded to S3 and then, using Amazon's API, it's immediately transferred to Glacier. This neat trick allows you to save up on storage by accepting low accessibility. Now let's see how you can actually perform this procedure. In Settings, Under Storage, click Amazon S3& Glacier.
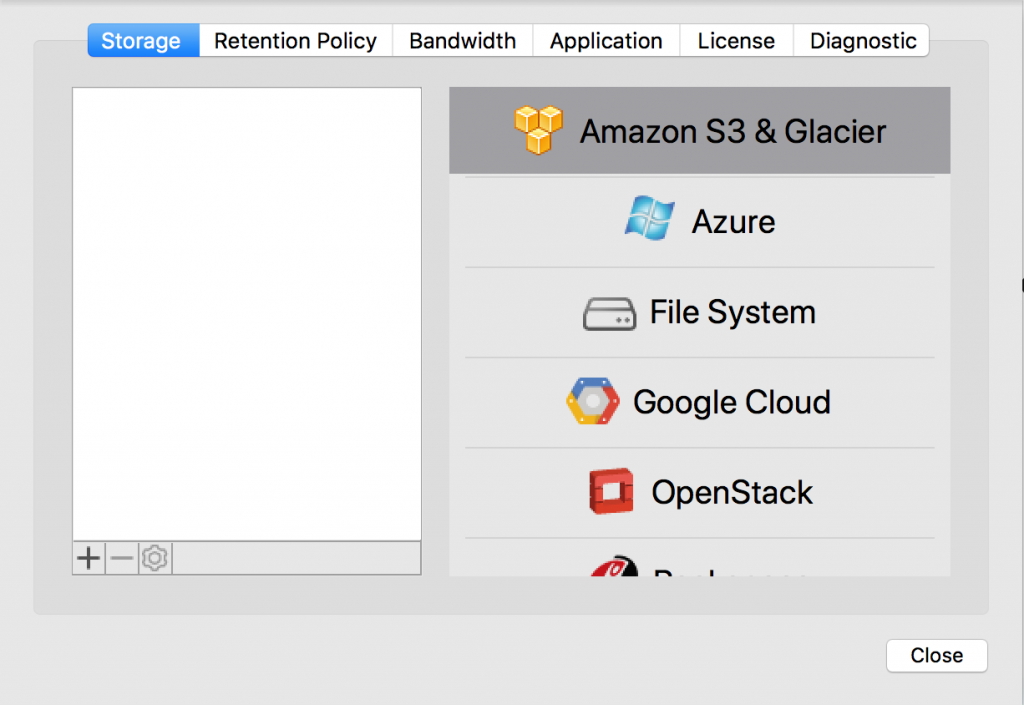
Beneath the credentials, select the Archive to Glacier checkbox and click OK.
Now whenever you perform backups to the above-stated backup destination, all your files will be immediately after upload be transferred to Glacier.