


If you're a Mac user, you probably know that Macs have their own backup system called Time Machine. This tool supports all user backup needs except cloud backup. In this post, we will explain how to use Time Machine to backup Mac.
Table of Contents
Every Mac is equipped with a great tool, which backs up data and the system in case if something goes wrong. Its name is Time Machine. The tool uses external storage or NAS systems with the support of Time Machine protocols to create a backup of every modified file automatically. But what would you do if the external drive gets corrupted? Even if you use a Time Capsule (a special Apple NAS system for creating backups), there is only one HDD inside -- which is a risk because if that disk fails, your data is lost. Smart users would use therefore another backup location to avoid such a scenario. Cloud storage is a great solution.
Pros and Cons of iCloud Backup
Starting with macOS Lion, Apple provided the option to save and back up user data to iCloud. So, enabling a basic cloud backup strategy is as simple as hitting a checkbox in the iCloud control panel. However, this feature doesn’t support file version history, and it works only with supported apps.
This is where third-party backup solutions like MSP360 backup solution for Mac come in handy.
Check the table below to compare the features of iCloud and MSP360 Backup for Mac:
| iCloud for Mac | MSP360 Backup | |
|
Support for built-in macOS apps |
V | X |
| Support for other files and documents | Using iCloud Drive only | V |
| System-level recovery | X | X |
| File versions history | X | V |
| Retention policies | X | V |
| Data transfer acceleration | X | V |
| Client-side encryption | X | V |
| Support for cheaper storage tiers for long-term archiving | X | V |
iCloud is a specific cloud storage service that is very limited in backup features but can protect internal apps’ data by default.
Let’s take a look at how to use Time Machine to backup Mac.
How to Perform Time Machine Backup to the Cloud
Below, we’re going to describe how to back up using Time Machine as a general backup tool operating jointly with MSP360 Backup and cloud storage. This scenario will save your data in case of any unfavorable circumstances.
Here is what you need before starting:
- MacOS 10.8 or later with a properly configured Time Machine. You will also need an external USB\Thunderbolt drive or a local NAS system that supports the Time Machine protocols. If you need additional info, please check this Apple guide.
- Freeware version of MSP360 Backup for Mac. Note that this version doesn’t support advanced features like compression and encryption.
- Supported cloud storage account. We will use Amazon S3 as an example, but you can choose a cloud of your preference.
In our scheme, Time Machine creates regular backups. After that, MSP360 Backup sends this data to the cloud and manages retention periods.
Here are guidelines on how to backup using a Time Machine repository on an external drive, and how to configure MSP360 Backup for this:
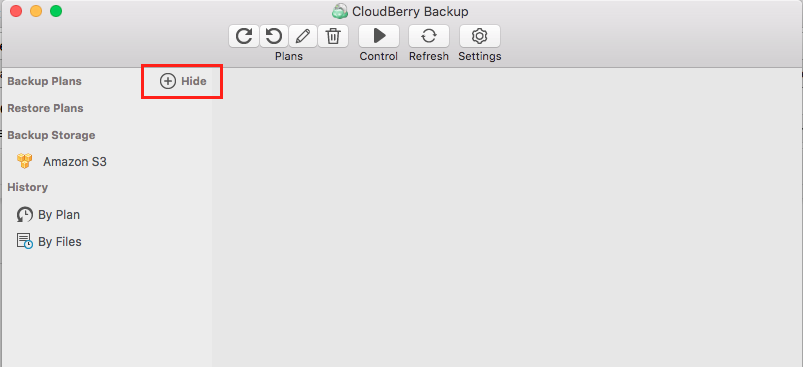
1 Click the Plus button next to the Backup Plans section on the left.
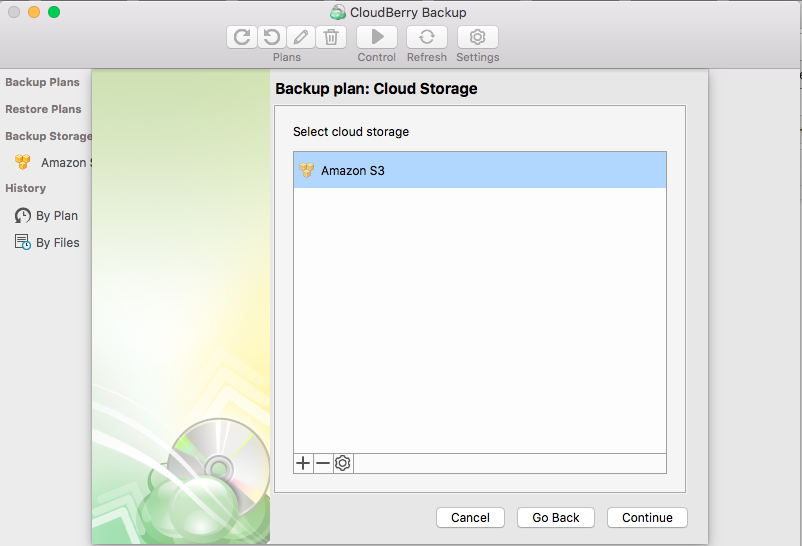
2 Proceed to Cloud Storage selection and choose a cloud. You may want to add an account using the Plus button.
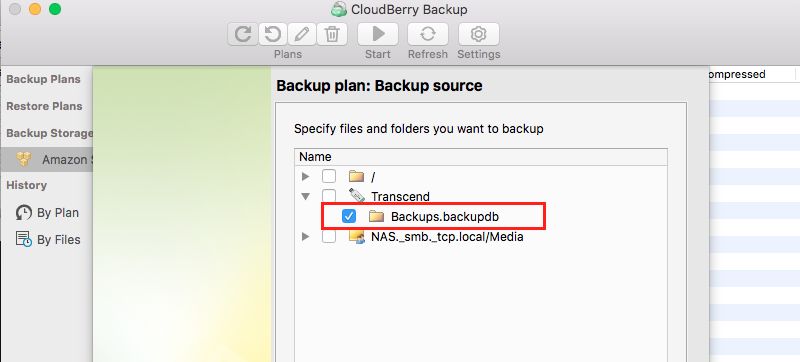
3 At the Backup Source step, navigate to the external drive and select the root folder typically called Backups.backupdb. It is the container for all Time Machine backup files. MSP360 Backup will send all modified files from this folder to the cloud according to a schedule.
4 Check the Backup empty folders checkbox and clear Exclude system folders to preserve the repository’s structure.

5 Select the desired retention period and allow MSP360 Backup to clear outdated data.
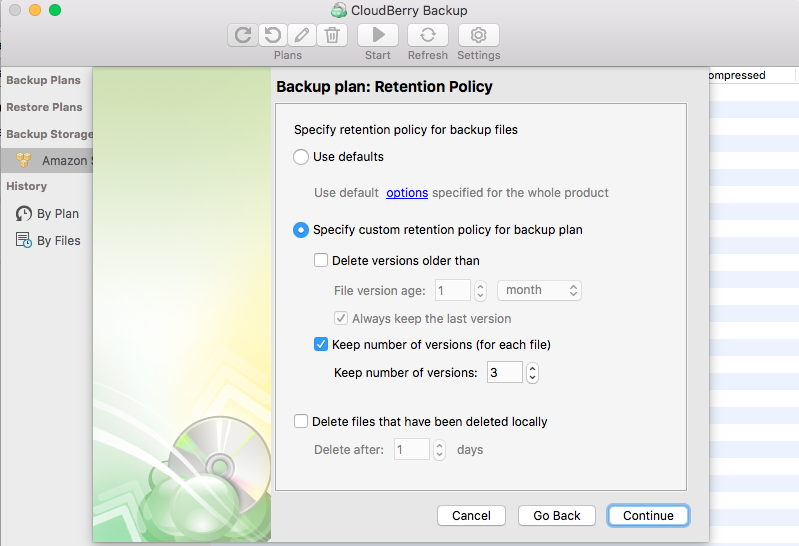
Keep in mind that it is not necessary to save many repository versions since each one already contains the history of all user file versions. A few repository versions are enough to protect data from corruption.
6 Next, you can choose advanced backup options like compression or encryption and select cheaper storage tiers for long-term archiving. This is a good idea because you will not download this data too often.
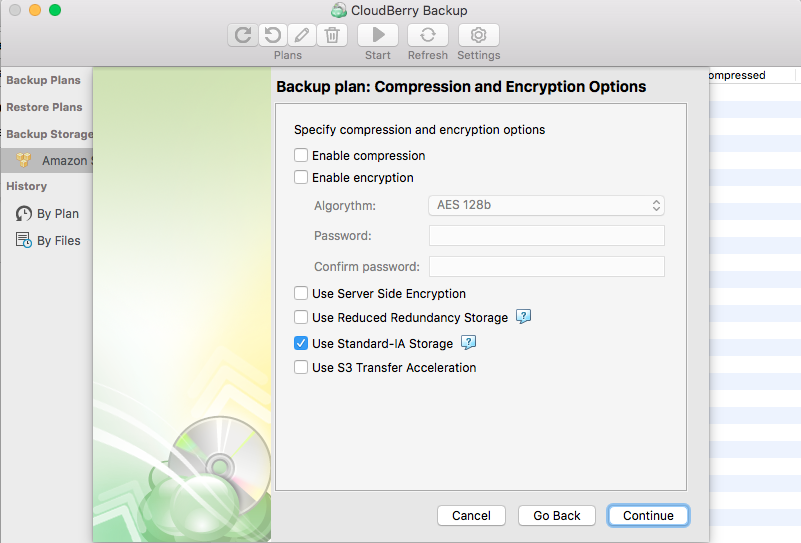
As an example, we choose Amazon S3 Standard Infrequent Access storage. If you want to learn more about different S3 storage options and costs, check our detailed post about Amazon S3 storage classes.
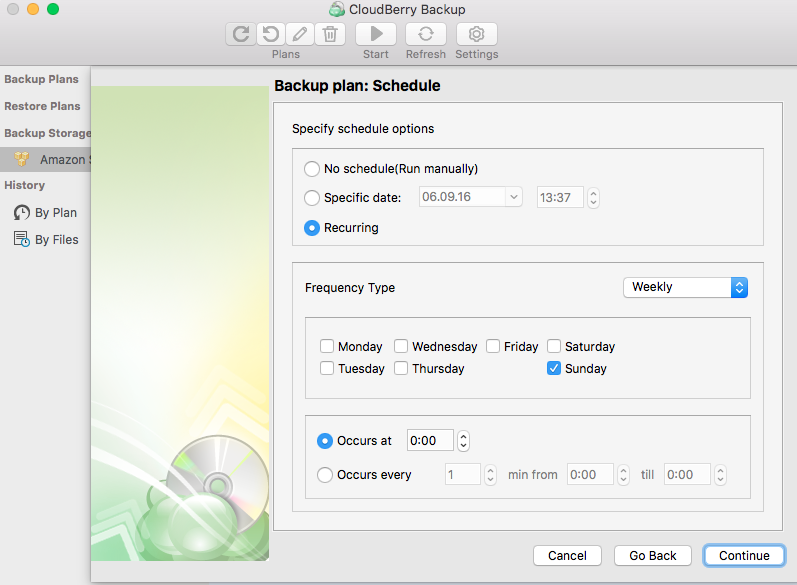
7 Specify the schedule for data upload to the cloud. We suggest choosing relatively long periods, such as multiple weeks.
FINAL STEP. Set notification options, review the backup plan summary and click Done. Now you have a local-to-cloud backup strategy for your Mac's data. And if you lose the drive that contains your Time Machine backups, you can simply restore data from the cloud, then use the Mac restoration interface as usual.
Further reading Backup Plan: The Ultimate Guide to Saving Your Data
Conclusion
Now you know how to use Time Machine to back up your Mac to the cloud. Check out our other Mac backup options in our separate article. You can also test the solution powered by MSP360 Backup for Mac for FREE during the 15-day trial.
Also, feel free to share your thoughts about backing up to a cloud using your Mac in the comments section below. We actively support system-level backup and recovery for macOS, and your opinion on the topic is important to us.
- Full and incremental backup
- Cloud and local storage options
- Encryption and compression

