
If you use Microsoft Windows 10 at home or in the office, it is crucial to have a proper backup infrastructure to avoid data loss in case of hardware malfunction, virus activity or human fault. In this article, we will explain what backup options you have and how to backup files in Windows 10 using MSP360 Backup.
Strategies to Back Up Files in Windows 10
When planning a personal or office backup strategy to protect user data, you first need to choose which option you need for Windows 10 cloud backup:
1. System image backup (or image-based backup) is a snapshot of the entire hard drive’s volume, including boot and system data. You can use such backup to restore a computer from scratch, without needing to manually configure any of the apps. Usable in case of hardware failure or system-level corruption, for example, you can replace a broken HDD with a brand new one, and then restore image backup to it.
Further reading How to Create a Full System Image Backup for Windows 10
2. File backup is an archive of certain files or folders that you can use to granularly restore lost or corrupted data. It is the most common type of backup that can help in several cases where crucial data becomes unavailable.


No matter which backup type you prefer, it is important to create backups as often as needed. If you use a computer from time to time, it is possible to automatically create a full data copy, for example, monthly. In cases where data is changed often, full backups will quickly flood all backup storage, so the best option here is to use a mix of weekly/monthly full backups with regular Windows 10 incremental backups.
In Windows 10 incremental backup is a feature that analyzes your files, finds new and modified ones and uploads only those, to your storage. You can read more in our blog article explaining how incremental backup works. Since incremental data copies are quite small (in general), you can run them as often as hourly. The main disadvantage of Windows 10 incremental backup, however, is that it grows in size until the next full backup is done.
It is worth mentioning that the industry “Gold Standard” of backup strategies is the so-called “3-2-1 Backup Rule”. It stands for an approach to increase crucial data resilience in situations of any disaster. The key is keeping several backup copies of data, spread across separate devices and storage sites: 3 separate data copies exist, 2 separate backup devices used, 1 copy placed somewhere outside of your home or office.
In the following chapters, we will find out how to perform Windows 10 cloud backup and restore it properly.
How to Perform Backup of Windows 10
Let’s look at how to create local, cloud and hybrid (creating the local backup, then copying it to remote storage) Windows 10 incremental backup using MSP360 Backup Desktop Pro Edition.
Note: You need at least MSP360 Backup Desktop PRO edition to perform Image-based backups.
First of all, you need to install MSP360 software for Windows desktop backup on your computer. Once this is done, we can create local data backup. You can use it for storing data copies on additional internal HDD or external drives – for example, USB drive.
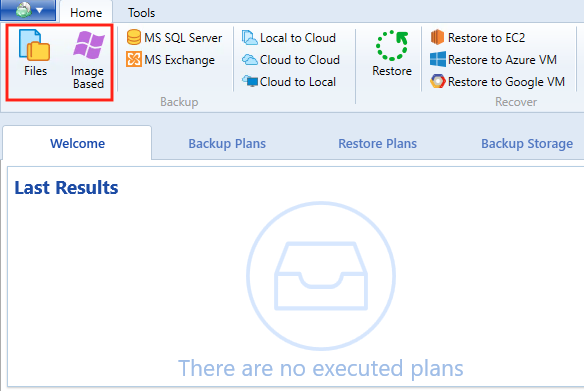
If you want to protect data on your PC from hardware malfunction, virus activity, etc. – then begin with the Image-Based button on the left-hand corner of the MSP360 Backup window. For backing up only important documents and files – use the Files button.
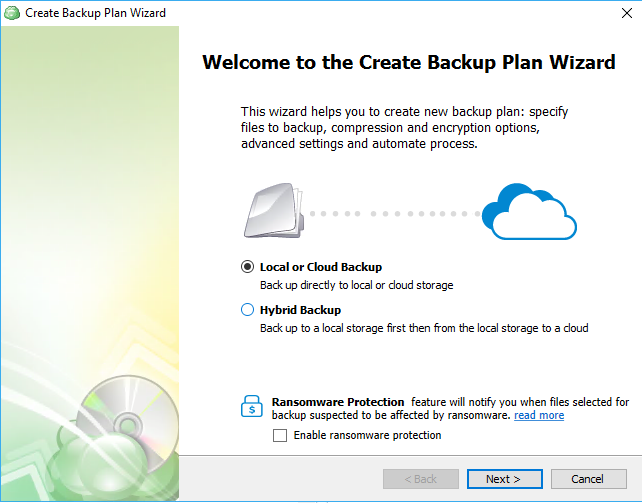
- Next, you need to choose a backup strategy: Local or Cloud backup, or Hybrid Backup. The first option allows you to have a separate data copy either on local storage or in a cloud service, but Hybrid backup allows you to combine both methods, thus achieving a more resilient data protection solution.
Let's explore all the options.
Local or Cloud Backup
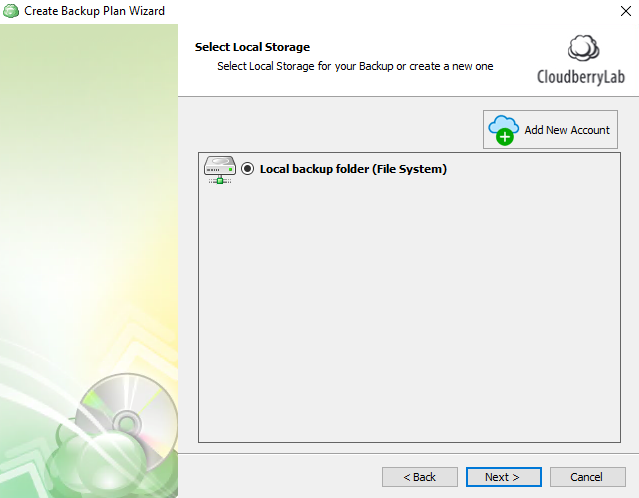
First of all, you need to add a storage account to the Select Backup Storage step:
- Press the Add account button and select the storage system of your choice. Local storage is available under the File System option or device-specific options, such as. If you don’t have enough local storage, you can create FREE trial tiered storage to check whether it meets your needs. For example, you can start the Amazon S3 storage trial.
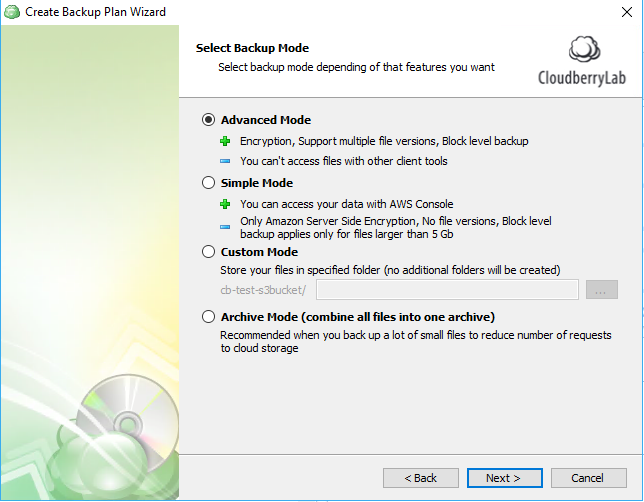
- After completing the storage account configuration, you need to specify a backup plan name, then select Backup mode:
- In the next step, you need to configure Advanced options, such as the use of VSS writer or block-level backups, etc.
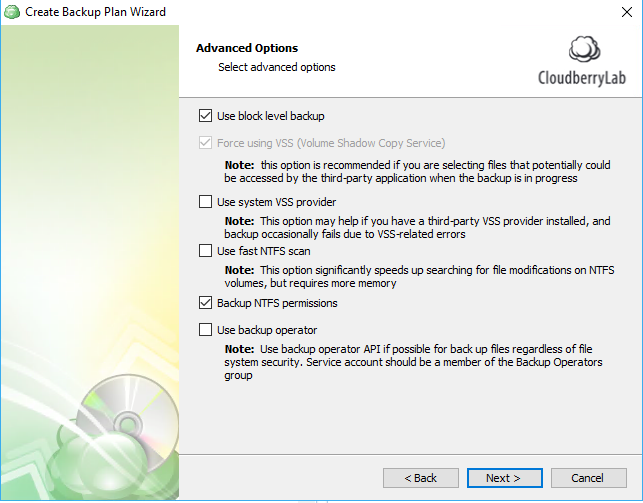
- Here are the options available:
- Block-level backup allows you to optimize subsequent backup runs by only copying changed data blocks;
- Force using VSS allows you to backup files in Windows 10 that are even opened by third-party apps or users.
- Backup NTFS permissions are necessary when you create a copy of shared resources, as it is imperative to rebuild access permissions in case of data restoration.
- And the final option – Backup operator – allows you to run the backup job from a special system account.
As a general rule for smoother Windows 10 cloud backup and restore procedures you can enable block-level backup (which also activates VSS features) and ask the program to backup NTFS permissions. Such preferences will help to recover data in many cases, and help to avoid “file is busy” errors.
In the Backup source step please select files and folders for backup. We suggest checking the entire drive partition or top-level folders.
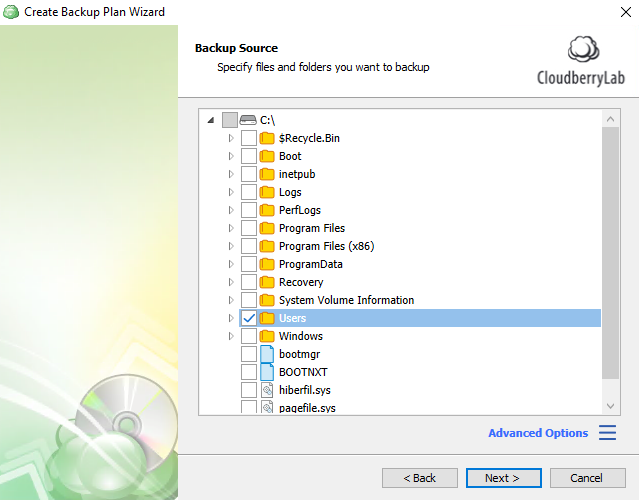
This approach can help when you add something to these folders in the future – all new data will be automatically included in the backup task.
- Advanced Filter feature allows you to get smaller backup archives by excluding unwanted data. You can exclude files by their extension, size or modification date, but we suggest including all files in a backup, as well as empty folders – it can be necessary to maintain folder structure in case of disaster.
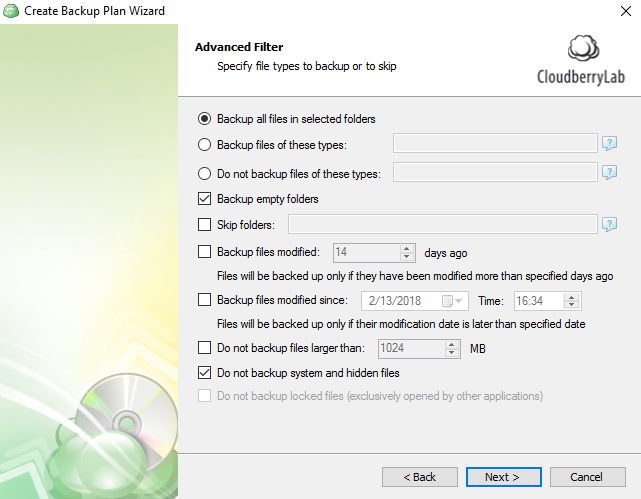
You can only skip hidden or system files, as they will often be automatically created by the system in case of restoration.
- The next step is to enable compression and encryption. Options allowed depend on backup storage used, for example, cloud storage typically allows you to enable server-side encryption with the selection of storage tiers.
- Retention Policy helps to keep a balance between the storage volume used for backups and data copies available.
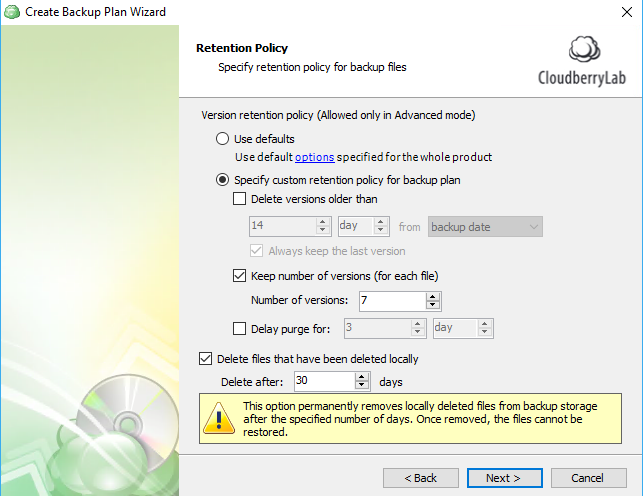
There is no general rule for this policy since users’ preferences can greatly vary. We suggest keeping a few versions of files each time and deleting unavailable files from the backup repository after certain intervals (one month or more, for example). Such an approach helps to restore data in the event you find data missing after a few backup cycles. It also maintains an efficient backup repository, thanks to the deletion of files that have been removed from your data.
- You will then need to schedule Windows 10 incremental backup runs. For data that changes often it is better to select a daily backup cycle, for anything else you may prefer a weekly or monthly basis.
- Full Backup Options help keep backup sizes low and ensure you can restore data quickly. If you can only run incremental block-level backups for data that changes often, you can get a Windows 10 cloud backup archive that significantly exceeds your actual data size (each incremental copy stores all data changed from the last full backup).
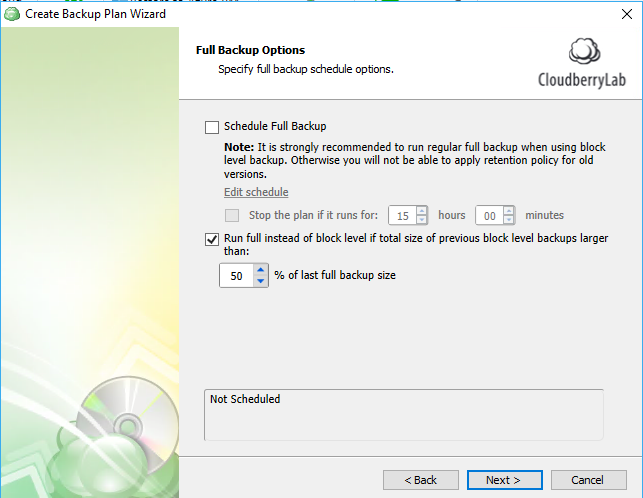
To avoid such situations you need to schedule full backups or look to creating a full data copy if the total size of your previous block-level backups is larger than that certain amount of your data. The second option can help if you are unsure of a desired full backup schedule.
- The following steps will help running pre- or post-backup commands (mostly necessary in corporate scenarios) and set email notifications on the job status.
Hybrid Backup
Hybrid backup allows you to meet the 3-2-1 backup rule by having separate local and cloud copies within one backup job. Its configuration wizard is mostly the same as the previous scenario, so you need only to select separate local and cloud storage accounts.
After every backup run, MSP360 Backup will copy newly created backup data, from the local backup repository to cloud-based. It differs from a separate backup-to-cloud job by collecting the backup data from the local storage repository, rather than working with “hot” data, directly. This approach can improve the computer’s overall performance.
Windows 10 Cloud Backup Recovery
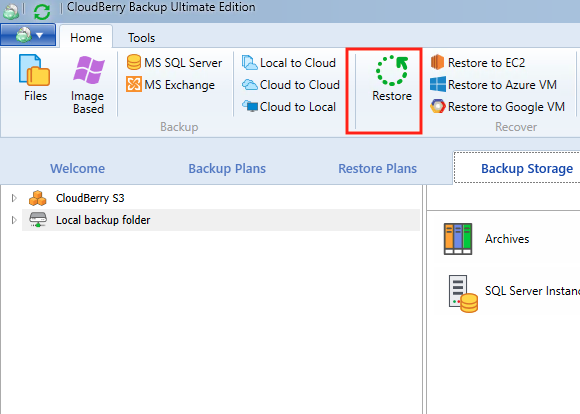
Recovering user data from cloud sources is an easy task with MSP360 Backup. You need to:
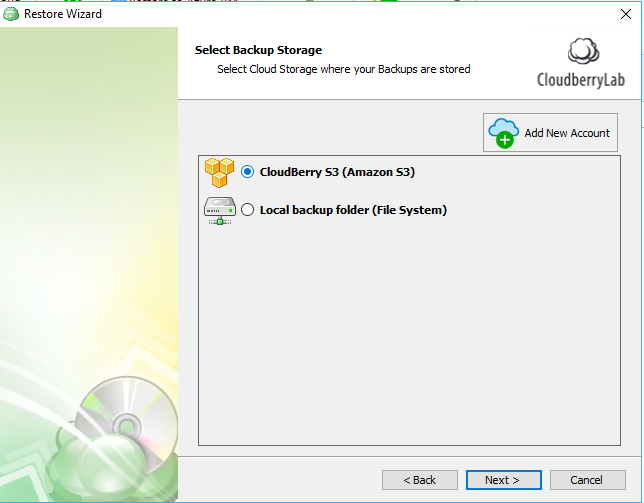
- Press on the Restore button in the main window.
- Then select the Cloud repository, that holds desired data.
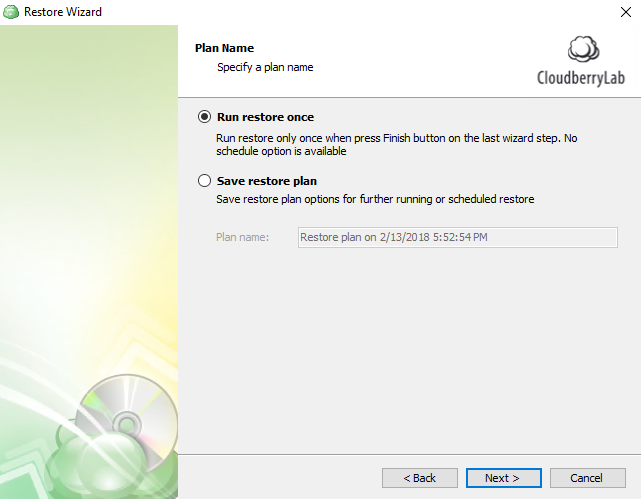
- Under the Plan Name, select Run restore once.
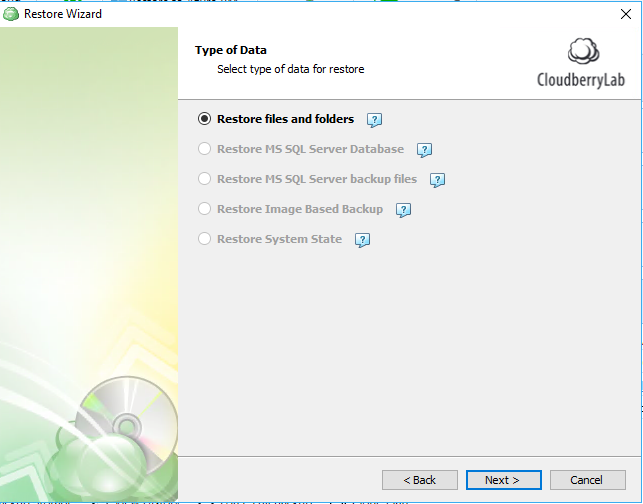
- In the next step, choose to restore files and folders for the general case. If your backup repository has special backups of Microsoft SQL Server or image-based, then you can select another type of restoration.
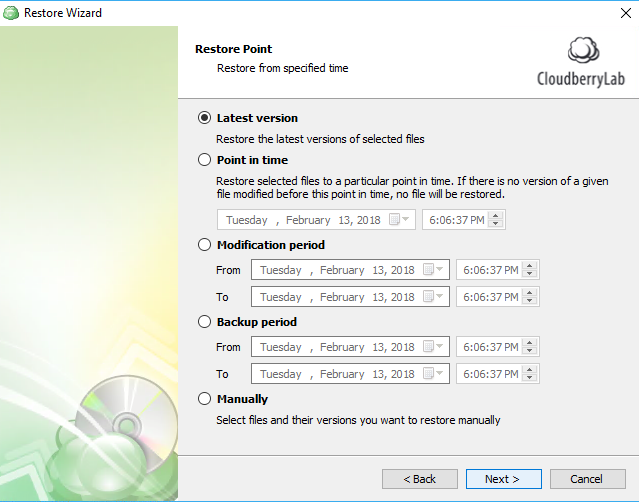
- Restore Point helps to choose the correct backup version. If you have more than one backup or want to restore certain versions of files – select the Point in time option and set the date and time. Otherwise, choose the 'Latest version'.
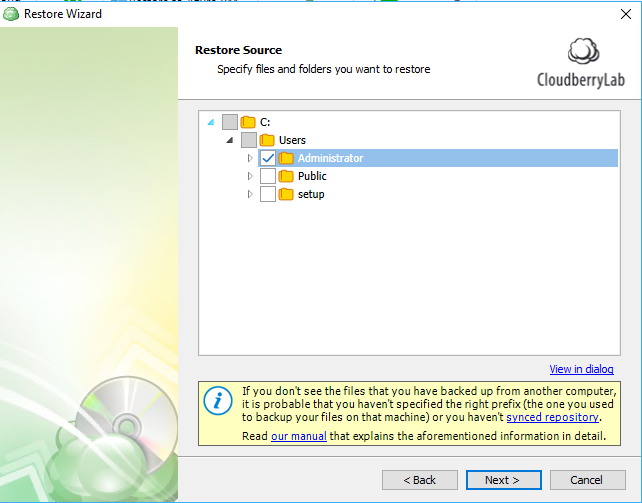
- In the next screen, select the necessary file or folder from the available sources tree.
- Next, you should specify the target file location. In most cases, it is better to select Restore to the specific location, since it can help to avoid data access collision or human fault.

As you can see, this step’s content depends upon the cloud repository chosen – for example, you can select the option Do not restore files located in Glacier for Amazon S3, thus avoiding unwanted spending.
Then specify the decryption key, if you set it earlier and configure the well-known email notification settings. After pressing Finish on the last wizard step the recovery process will start.
Summary
Now you know how to back up files in Windows 10 and restore them using MSP360 solution for Windows backup. With MSP360, you can implement any backup strategy with a mix of local and cloud repositories.
Check if our solutions meet your needs during a 15-day free trial. If you have any questions, feel free to ask in the comments below.
Simple. Reliable.