
MSP360 Backup for macOS & Linux is fully equipped to work with network shares when it comes to data backup. If you want to back up an entire network share, MSP360 Backup has you covered. In this article we go a little deeper into the process of mounting and backing up network shares.
Backing up Network Shares on Linux
Backing up network share on Linux is not fundamentally different from regular file backup. A network share is first mounted and then selected as the backup source in MSP360 Backup. According to the feedback we get from our customers, the main issue lies in the process of mounting. With that in mind, let us demonstrate how to mount and back up a network share on Linux.
It is crucial to first install the packages required for mounting network shares. In this tutorial we're using the cifs-utils package. Install it by executing the following command:
sudo apt-get install cifs-utils
Once the package is installed, proceed to mount a network share by executing the following command in terminal:
sudo mount -t cifs -o username=admin //shareIPaddress/directory /home/robert/Desktop/ShareShortcut/
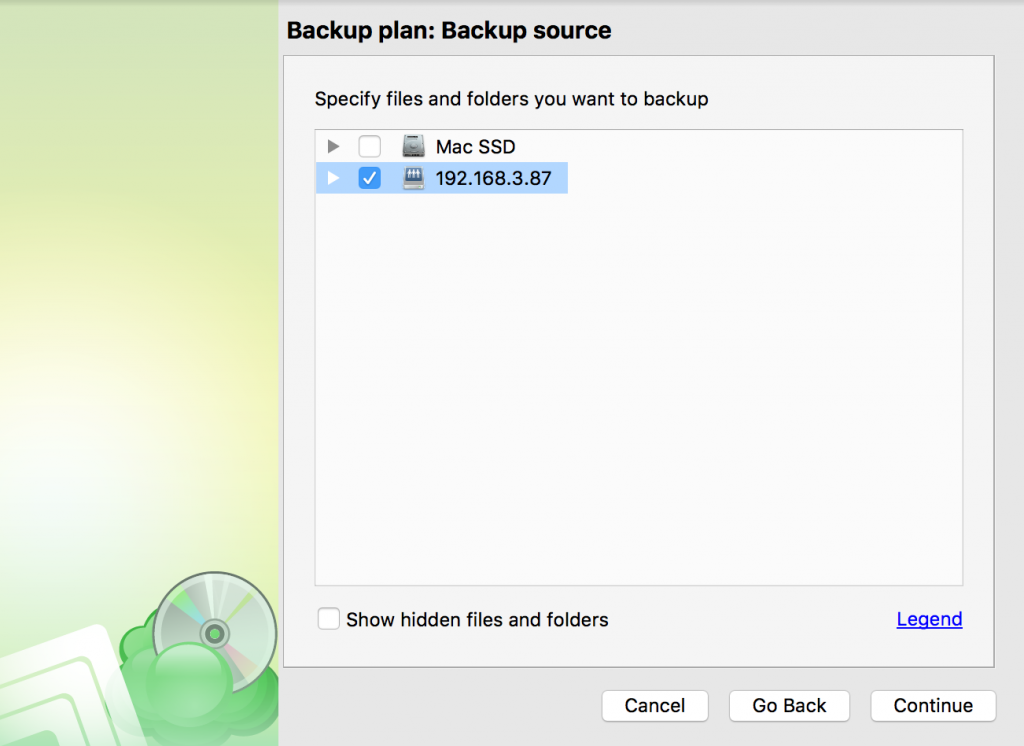
Having mounted the network share, it will appear as a backup source in the Backup Wizard.
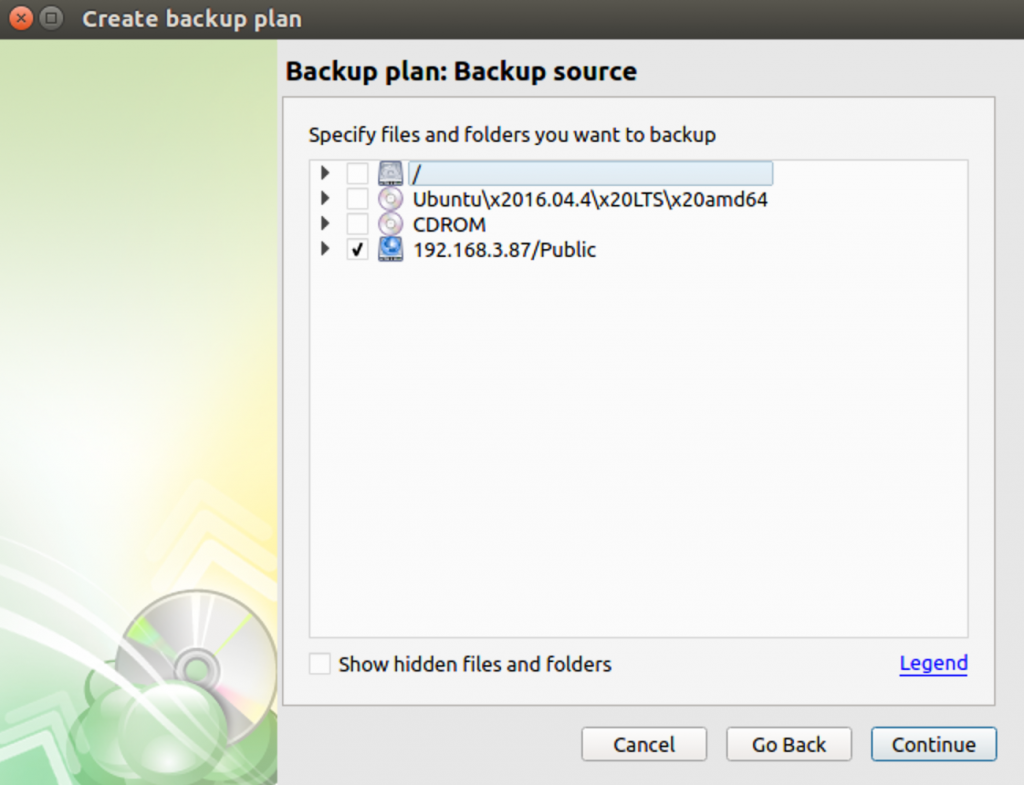
Conclude configuring the plan and execute it afterward. The network share is now backed up!
Backing up Network Shares on macOS
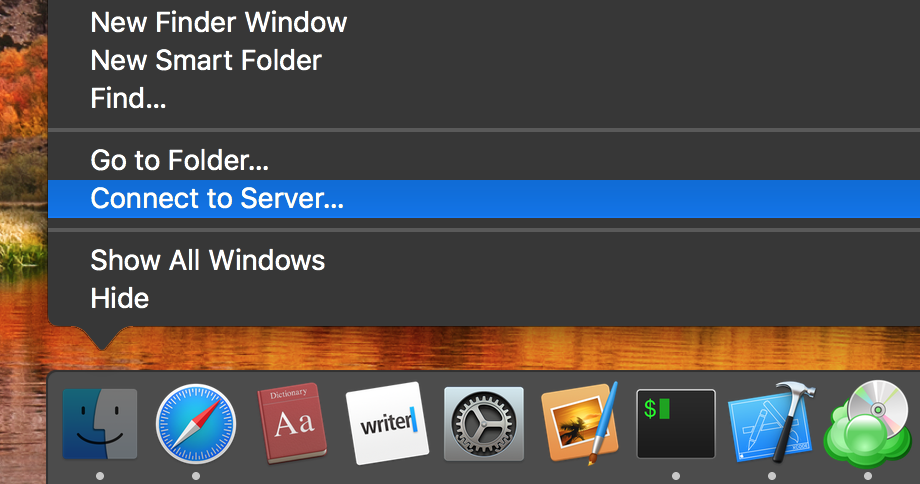
Mounting a network share on macOS is not difficult either. The easiest way to mount a network share is with the help of Finder. Simply right-click on its icon and click Connect to Server.
Enter the following address to establish a connection:
ftps://username@shareIPaddress
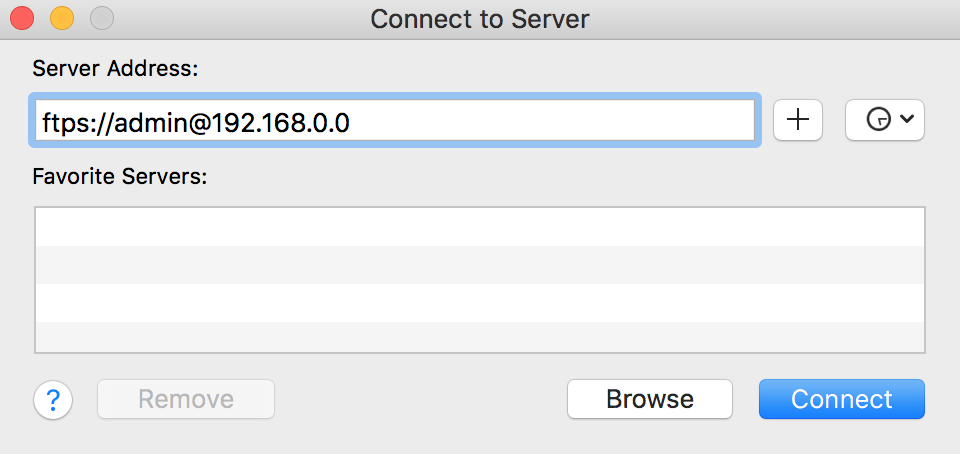
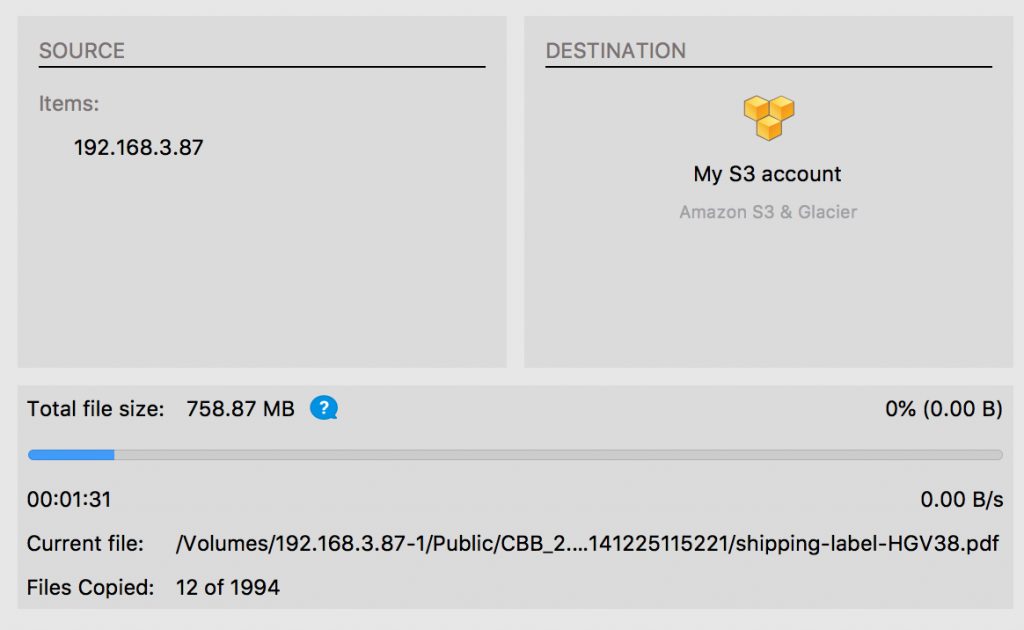
You will be prompted to enter the password for the specified username. Afterward, the share will be mounted. Now it's time to back up the share. Launch MSP360 Backup and proceed to create a backup plan by pressing Cmd + B. When you reach the backup source step, select the share and conclude configuring the plan. When done, execute it.
You network share is now being backed up!