Identity and Access Management (IAM) is a service that allows creating user accounts inside the master account and grants those account a set of permissions. MSP360 Explorer PRO comes with full support for IAM service and you can learn more about that in our previous blog post.
In this blog post, we will look into the very common scenario of creating a subaccount within the master account and granting it permissions to create a bucket. This might be useful if you, for instance, work with freelancers and want them to be able to work with the content in their own bucket.
Creating a Policy
Click Access Manager in the main menu to run IAM management tool from within MSP360 Explorer: ![]()
In the Access Manager click New User to open up a dialog. Name the user and click Ok. 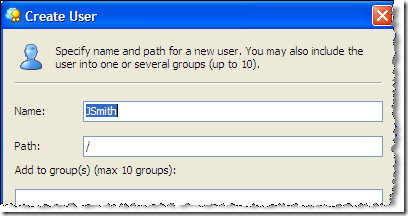
The new user should show up on the list. Right click it and click Add Policy…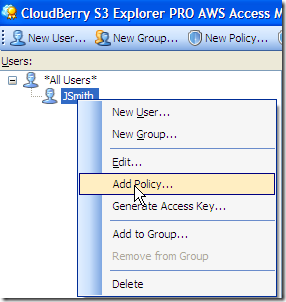
Click New Statement and then to choose the list of actions that your new users will be allowed to do. You can see below those the most common ones.
Click in: to specify the bucket name and the path. Make sure to add “/*” to the path to propagate the policy to the bucket content.
Click New Statement once again, this time for the bucket itself.
Choose S3: ListBucket for action and make sure that you don’t add “/*” at the end. This is because you are applying the statement to a bucket, not to its contents.
You can optionally set a condition. For example, a date until it's valid, after which the user will not have access to the resource.
Click Ok to create the policy.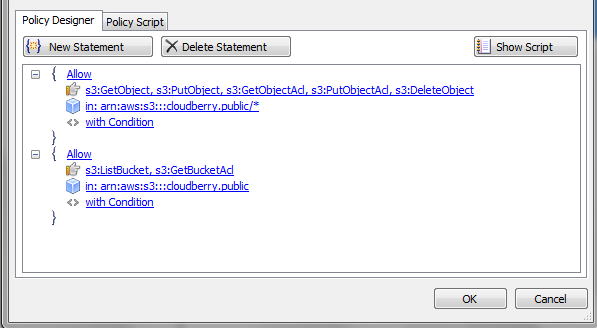
Here is the policy text for you to copy:
{
"Statement": [
{
"Effect": "Allow",
"Action": [
"s3:GetObject",
"s3:PutObject",
"s3:GetObjectAcl",
"s3:PutObjectAcl",
"s3:DeleteObject"
],
"Resource": "arn:aws:s3:::cloudberry.public/*",
"Condition": {}
},
{
"Effect": "Allow",
"Action": [
"s3:ListBucket",
"s3:GetBucketLocation",
"s3:GetBucketAcl"
],
"Resource": "arn:aws:s3:::cloudberry.public",
"Condition": {}
}
]
}
Last but not least, you have to generate an access/ secret key pair for your new user. Click Generate Access Keys… in the user context menu. Copy the keys so that you can hand them over to the user later.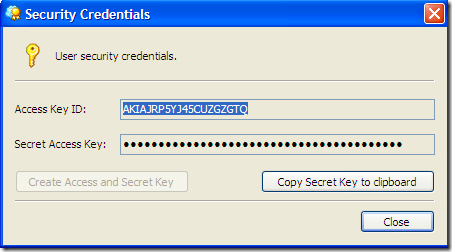
Working as a User
Register an account for the newly created user in MSP360 Explorer console. Use the assess/ secret key created earlier. 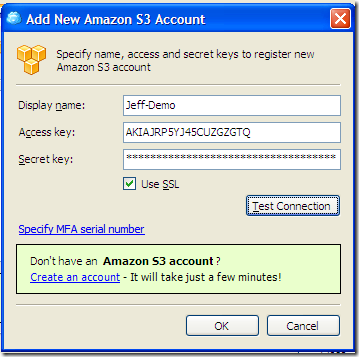 Note: you can use MSP360 Explorer freeware to register one bucket for IAM users. If you need to register more than one bucket you will have to turn to our PRO version.
Now, select the newly created account in the drop-down list. If you look at the list of buckets it will be empty. This is because we have not granted the user a right to list all buckets. You have to add a bucket as an external bucket manually. Click a green button on the toolbar and type the bucket name manually.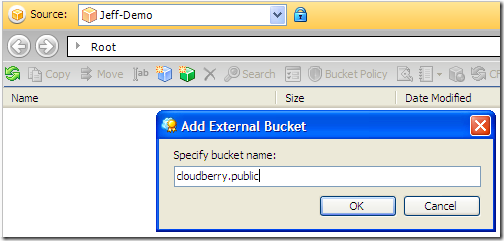
Now you can see the bucket in the console. You can copy, move, delete files, create folders, etc. 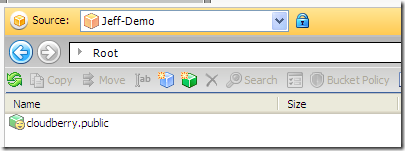
As always we would be happy to hear your feedback and you are welcome to post a comment.

