

If you are performing data recovery on the changed hardware setup you often need to resize partitions of your drive. In this article, we will overview this process for Macs.
Messing with partitions is dangerous - you can lose all your data in one click. Before you start with any operations with partitions, make sure you have a solid backup. If you don't have any, check out our MSP360 Backup for macOS
Table of Contents
You can perform any disk-related operations in macOS using the built-in Disk Utility. Its GUI was seriously redesigned the release of “El Capitan”, so you may notice some interface differences if running an older Mac. In this example we will use macOS High Sierra.
Disk Utility is quite a simple tool to resize partition in Mac, but there are a few recommendations that can save your time:
- If using an Apple Fusion Drive (technology that represents separate HDD and SSD drives like one logic device), never use a Disk Utility older than one used for the creation of Fusion Drive. So, if you built a Fusion Drive in macOS Yosemite - don’t use OS X Lion or other older versions.
- You can only extend the partition to the free space right after the current partition. If there is something in between - you need to remove it.
- You can avoid data loss while resizing the partition only for GUID-partitioned drives. It is a common partition table for the latest Macs, but check it anyway.
Shrinking Mac Partition
You can shrink partition size with no data loss if there is unused space in its volume (remember, volume is a layer of file systems above a partition).
So, let’s check how to shrink a partition using Disk Utility:
- Open Disk Utility by typing the first part of its title in Spotlight search:

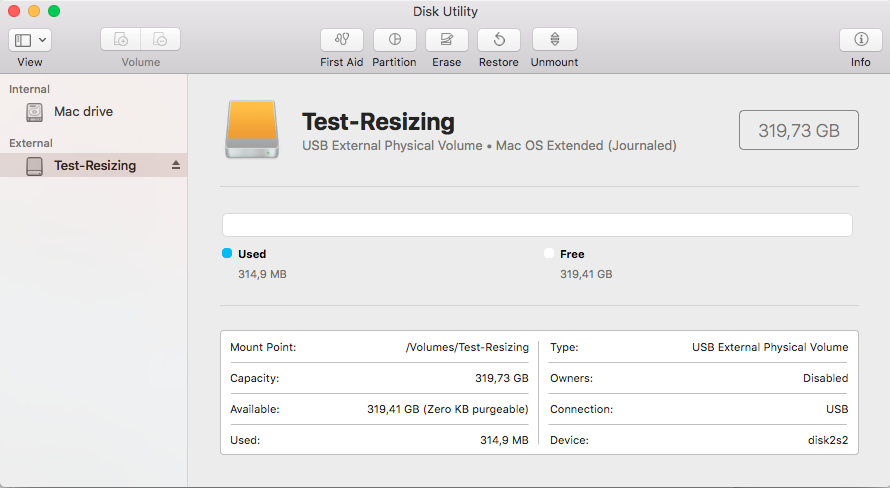
- On the picture below you can see our test configuration - external USB drive with a single partition “Test-Resizing”.
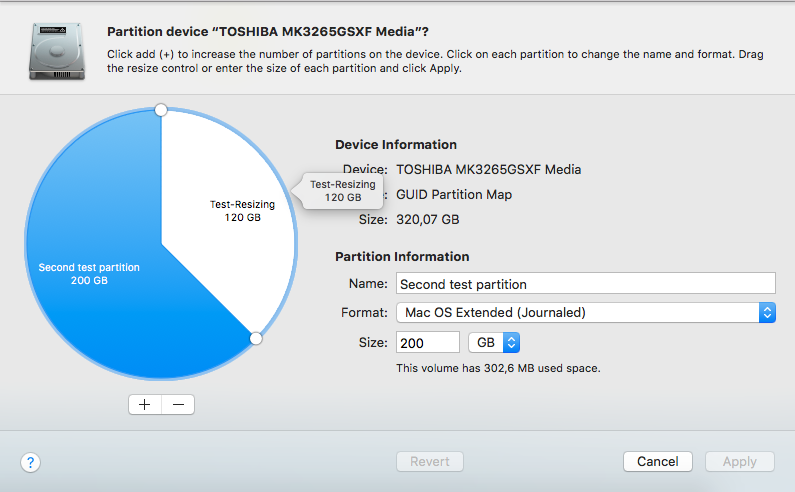
- Press the Partition button on the top and a new window with a partitions allocation pie chart will appear. You can simply add additional partitions by pressing the plus button and then using section control (2) to adjust its size. So, you will shrink the existing partition and then add the second one. Press Apply.

- Now the source partition size became lower and we got a new partition “Second test partition”.
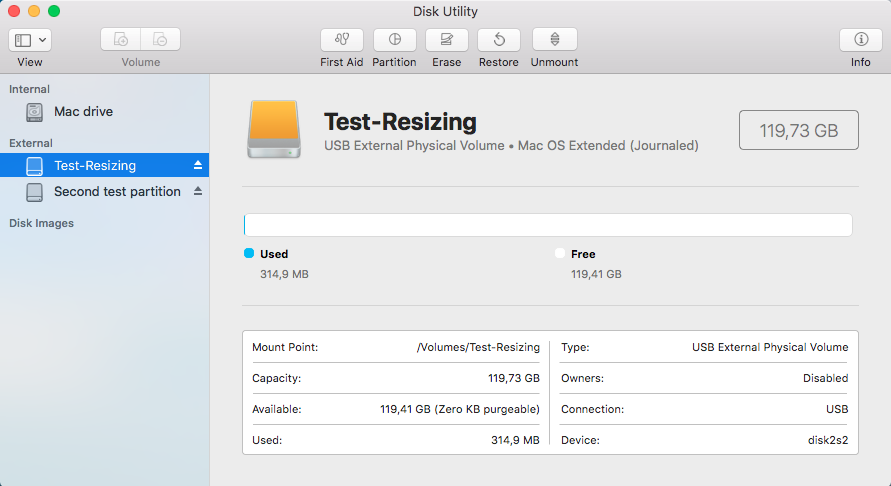
Of course, the data placed on the volume “Test-Resizing” remains untouched.
Extending Mac Partition
Since adding a more spacious disk drive is a common way to upgrade for any Mac user, let’s try to handle it:
- Open Disk Manager, navigate to the partition you want to extend and click Partition button.
- As you can see, the pie chart consists of two partitions and you can’t directly shrink “Second test partition” to extend the first one. We need to remove the second partition by pressing the “minus” button and then select a new size for the “Test-Resizing” partition. By default, Mac will choose all available space. Click Apply after selecting the proper volume size, so changes can be applied.
If your secondary partition is not empty, you can move its data to another drive’s partition or just create its backup using Apple Time Machine or third-party backup tool.
Conclusion
This is it. Feel free to comment and ask any questions.