

In this article, we explain how to perform the cloud restore of your image-based backups as Google VM instances.
How to Do Full Server Restore to Google Cloud VM with MSP360 Backup
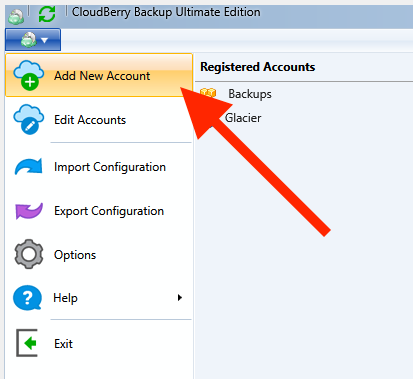
- First things first, launch MSP360 Backup and add your Google Cloud Platform account. Note that you can use your Google Cloud Storage (just like any other) to store your image-based backup prior to restoring. It’s even easier that way since you essentially have the same account. Click Add Account.
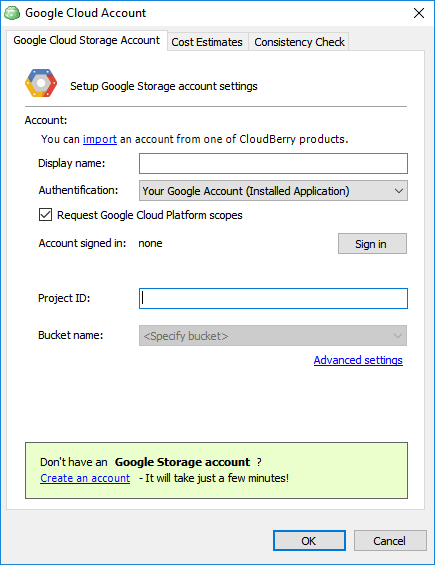
- Select Google Cloud. Specify the preferred display name, authentication method, project ID, and bucket name. Ensure that the Request Google Cloud Platform scopes checkbox is selected so that MSP360 Backup can communicate with Google Cloud Platform. Click OK.
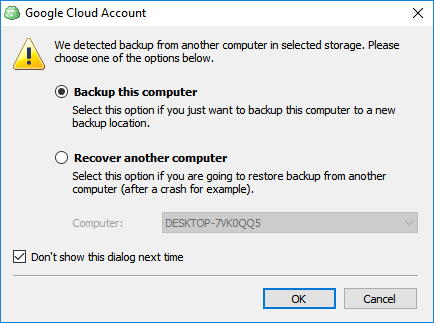
- An alert will pop up asking if you want to recover another computer or back up this computer. We’re just gonna select Backup this computer. Click OK.
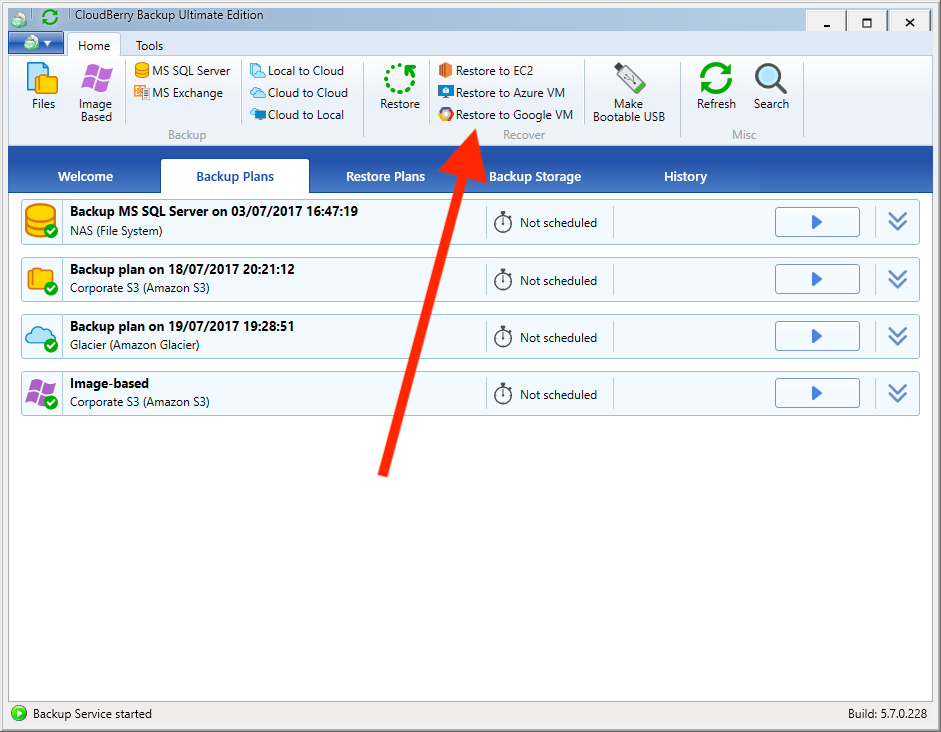
- Now let’s proceed to restore our backups. Click Restore to Google VM.
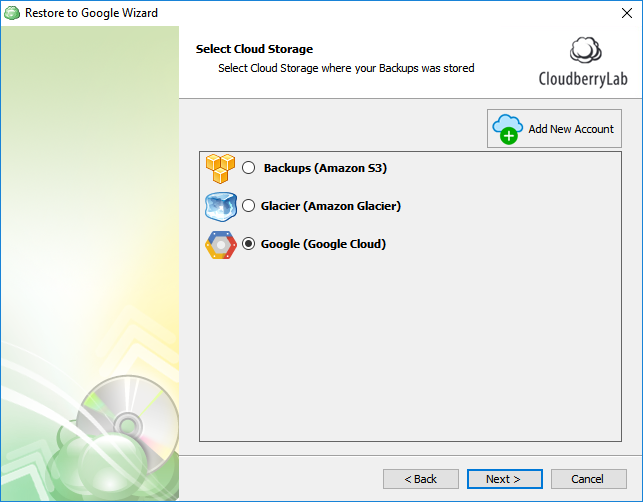
- Commence setting up the plan. Select the requisite cloud storage that contains your backup and click Next.
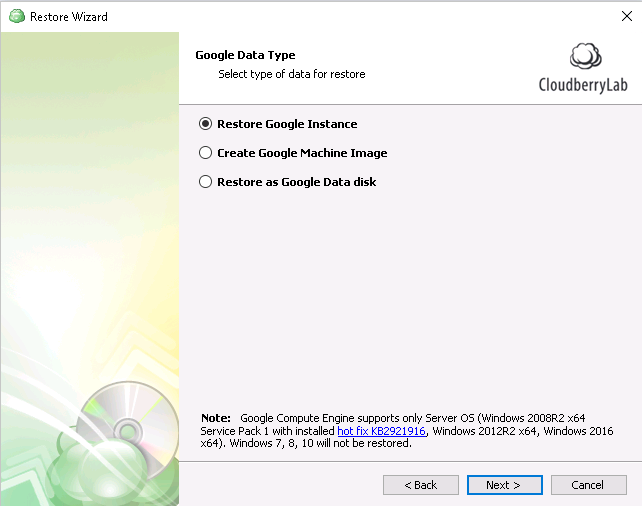
- Continue fine-tuning the plan until you’re prompted to select the Google Data Type. You have the options to create a new Google Machine Image, restore your backup as a Google Data disk, or restore as a Google instance.
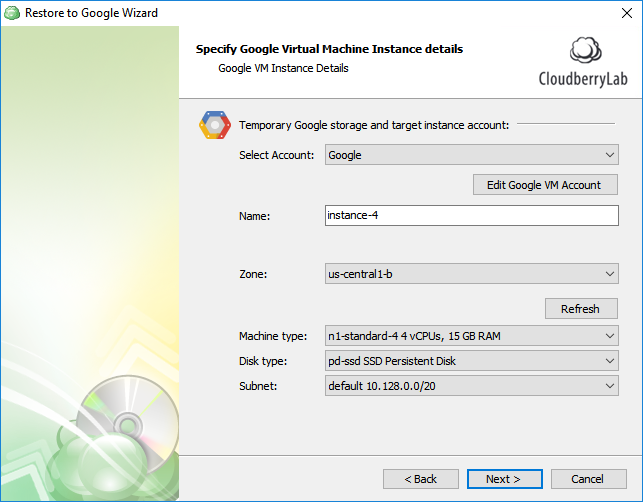
- Now you need to specify the Google VM Instance details. Select your account, enter a name, select the zone, machine type, disk type, and Subnet. Сlick Next.
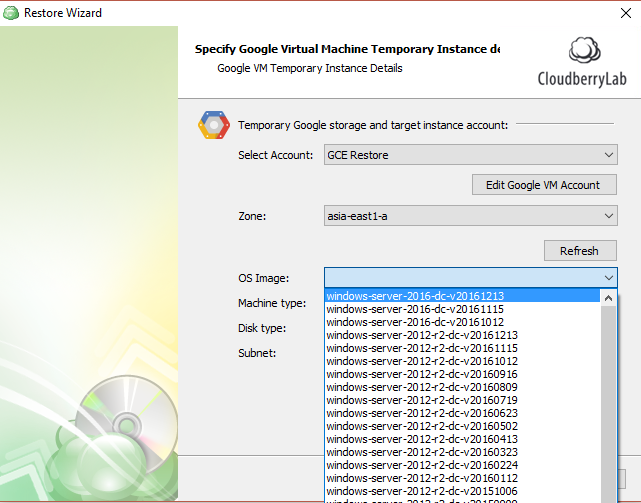
- Using a temporary instance can expedite the process; however, bear in mind that extra fees will be applied (the rates vary depending on the machine type you select). Also, you cannot use a temporary instance if the source storage is your local file system. Click Next.

- The temporary instance details will most likely be specified for you; although, we do recommend selecting the first option in the OS Image drop-down menu. Click Next.
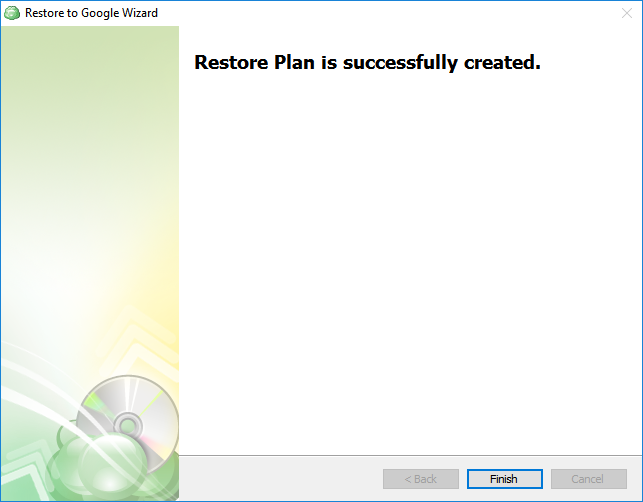
- Conclude setting up the plan and click Finish. Then execute the plan and wait for it to complete.
- Having done that, expect the instance to appear on your Google Cloud Platform panel. Now you're good to go.
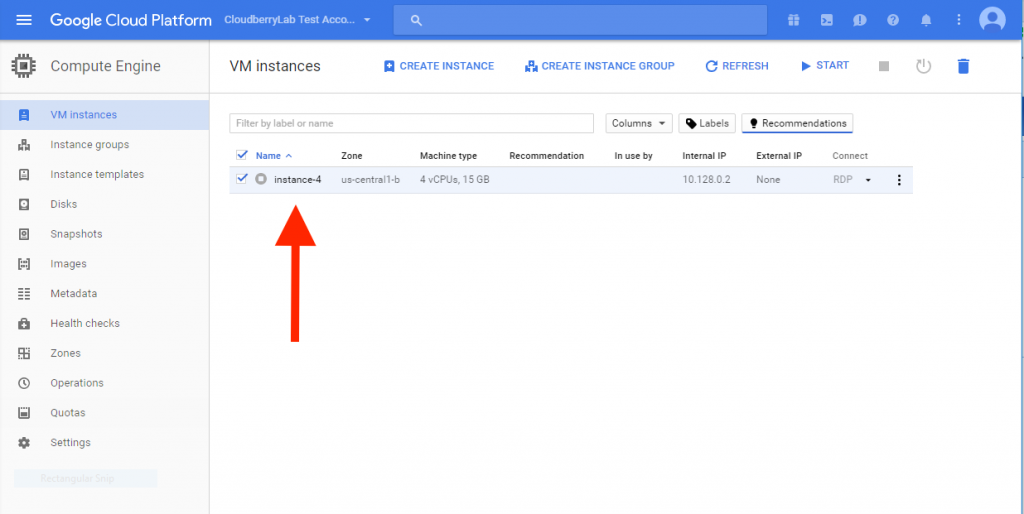
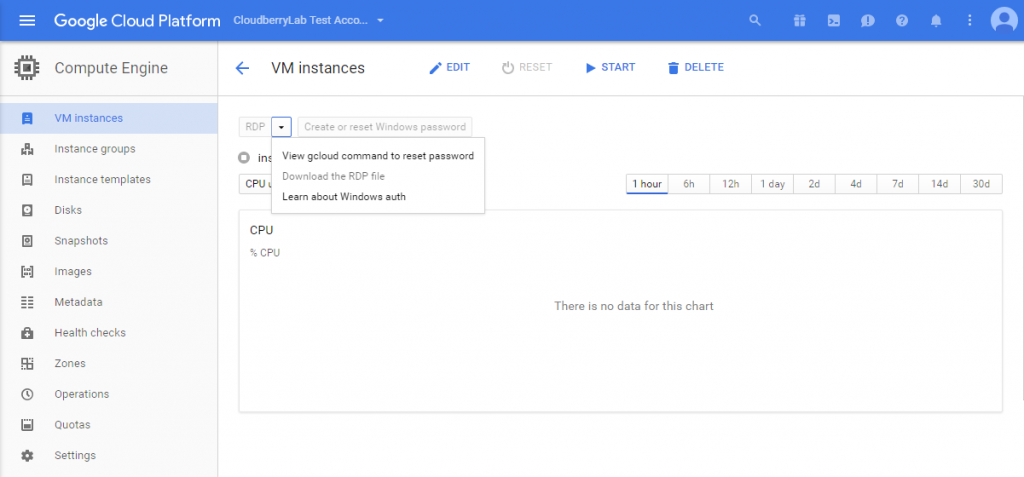
- Click Start to launch your virtual machine. Then download the RDP file and start using your virtual machine. If you encounter any connection issues, please check your firewall rules.
Conclusion
With MSP360 Backup you can also recover to Amazon EC2, Microsoft Azure VM, virtual or local environment. Check out the fully functional 15-days trial and decide if it fits your needs.