Please note that MSP360 Backup supports AWS Snowball Edge device only, the use of AWS Snowball device is deprecated.
While MSP360 backup handles rather large volumes of data effortlessly, some concerns still remain with regard to the feasibility of utilizing the available internet connection for such purposes. Naturally, dozens of terabytes (even less) of data would take forever to upload even with a swift bandwidth, let alone a subpar connection. Besides, many Internet providers impose data caps on their users which could clearly impede any attempt at uploading data of volumes upwards of a certain number of terabytes. Thus, it may seem more appropriate to inspect other solutions to this conundrum.
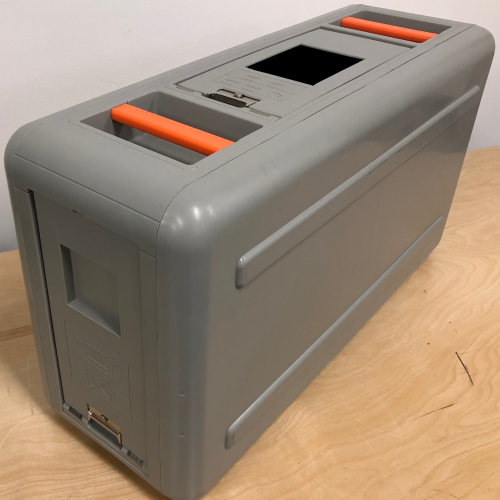
Thankfully, Amazon provides a very neat and convenient service to solve this problem. It’s called Amazon Snowball. Amazon can provide you two types of Snowball devices: Snowball Edge and Snowball. The main difference here that the Snowball Edge comes with computing capability and stores up to 100 TB of data.
It works rather simply; in a nutshell, you request the box from Amazon, upload your data to it, ship the box back to Amazon, and then wait for them to upload it to your bucket at their data storage facility. It is a pretty straightforward process. Surely, there are some technicalities here and there, but overall it’s a piece of cake. Feel free to read this article to learn more about the Snowball.
Now that you get the idea behind Amazon Snowball, let’s talk about how MSP360 Backup facilitates this process. While ordering and shipping the box back is performed by Amazon, the data transfer from your machine(s) onto the Snowball Edge is conducted with the help of our backup product. Long story short, you set up a backup plan as usual, except that your destination is now the Snowball Edge, not a cloud storage. Hereinafter we explain in detail the process of setting up such a plan and all the associated steps.
It’s critical that you use a suitable machine for data transportation. It should be able to meet the high demands in terms of processing, memory, and networking. Read this article to learn more about the Snowball Edge specifications.
Ordering a Snowball Edge
Having gotten a better picture of how the process works, you may commence ordering the Snowball Edge. Head over to Amazon Web Services (be sure to select your region).
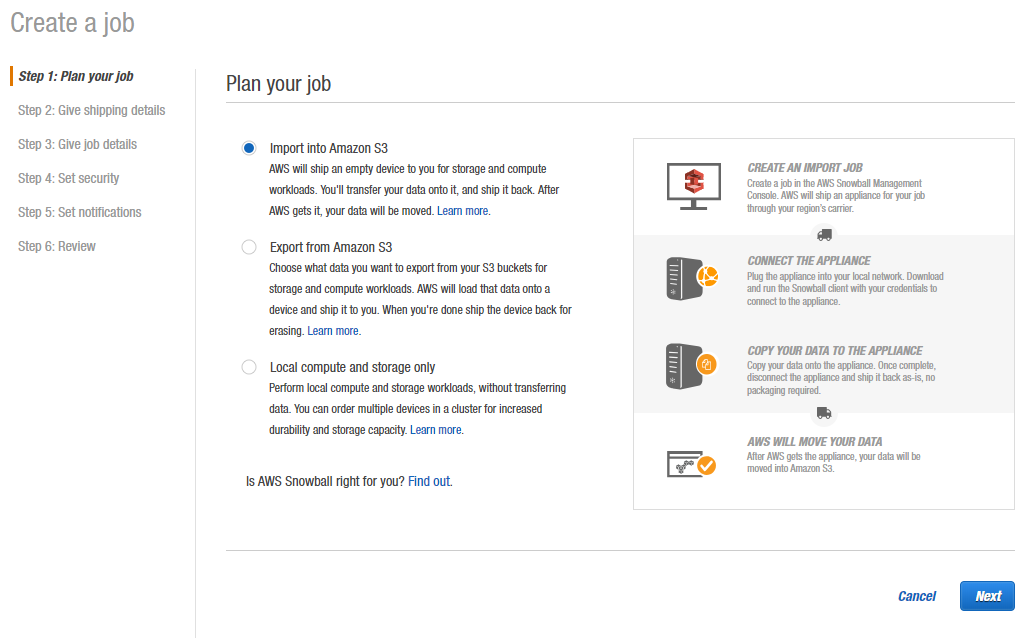
Step 1: Plan your job
Here you can create a so-called import into Amazon S3, export from Amazon S3 or local compute and storage job. However, we are interested in the import option.
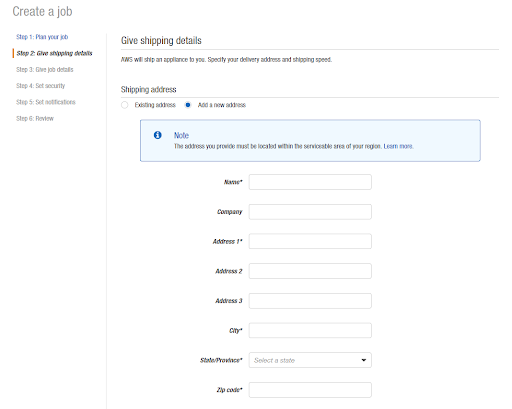
Step 2: Give shipping details
Next step is to fill in your address and select the preferred shipping speed.
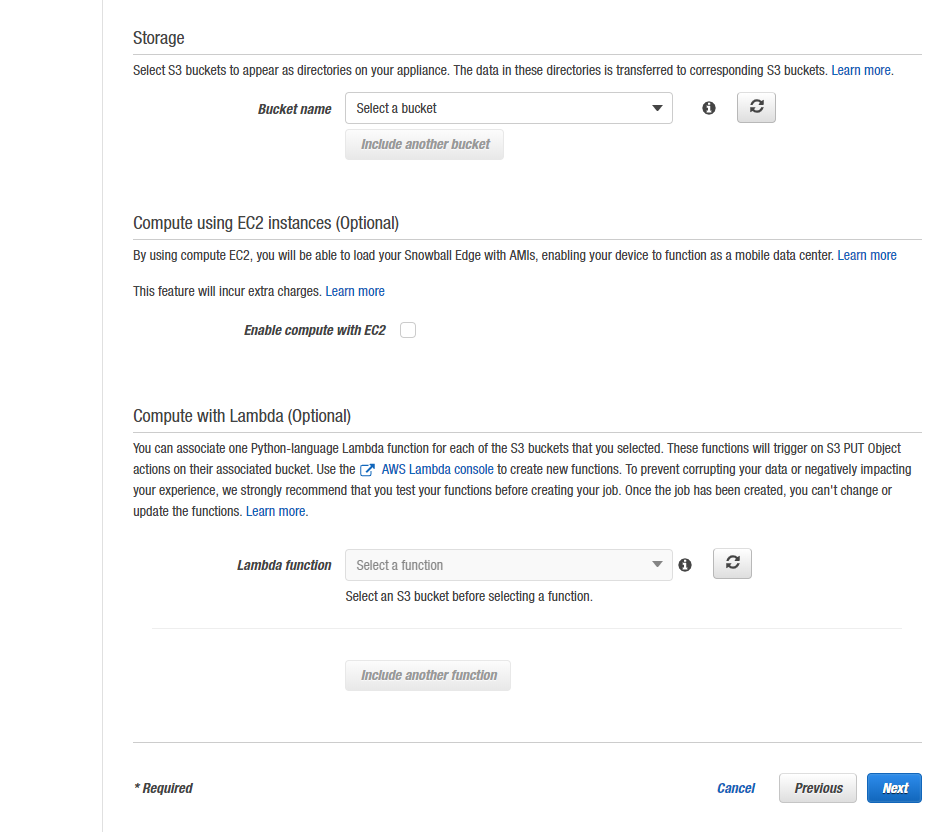
Step 3: Give job details
Now you need to enter a job name, choose a Snowball Edge capacity (device type) and specify (one or multiple) target buckets. Then click Next.

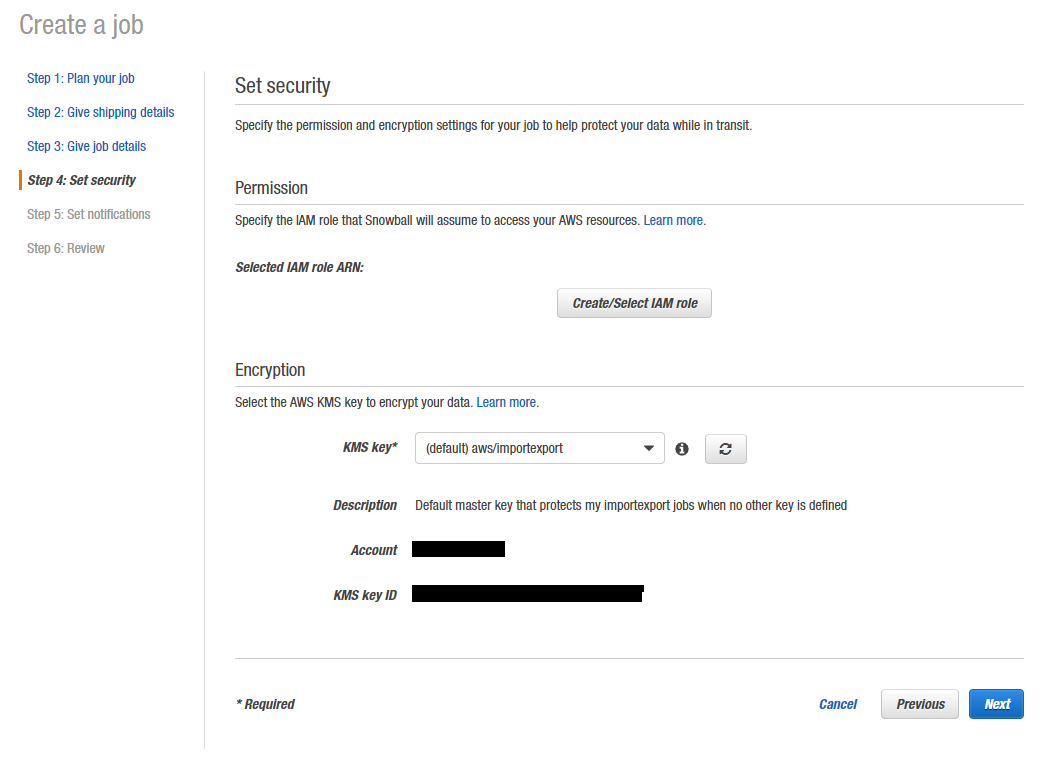
Step 4: Set security
Here you need to set up security parameters: permission and encryption settings.
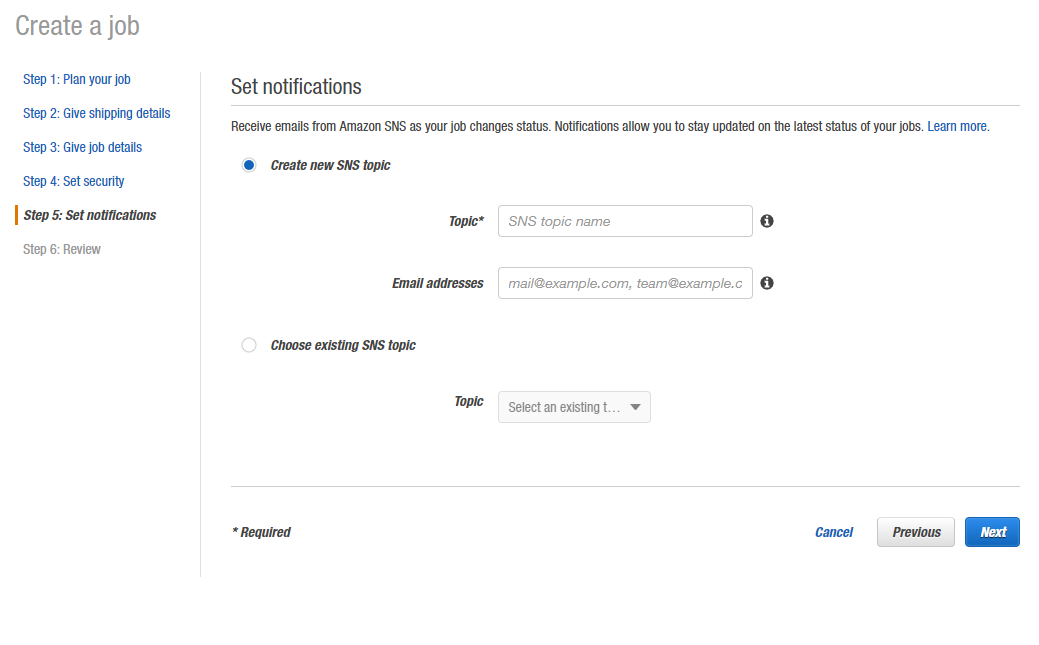
Step 5: Set notifications
Proceed with notifications preferences.
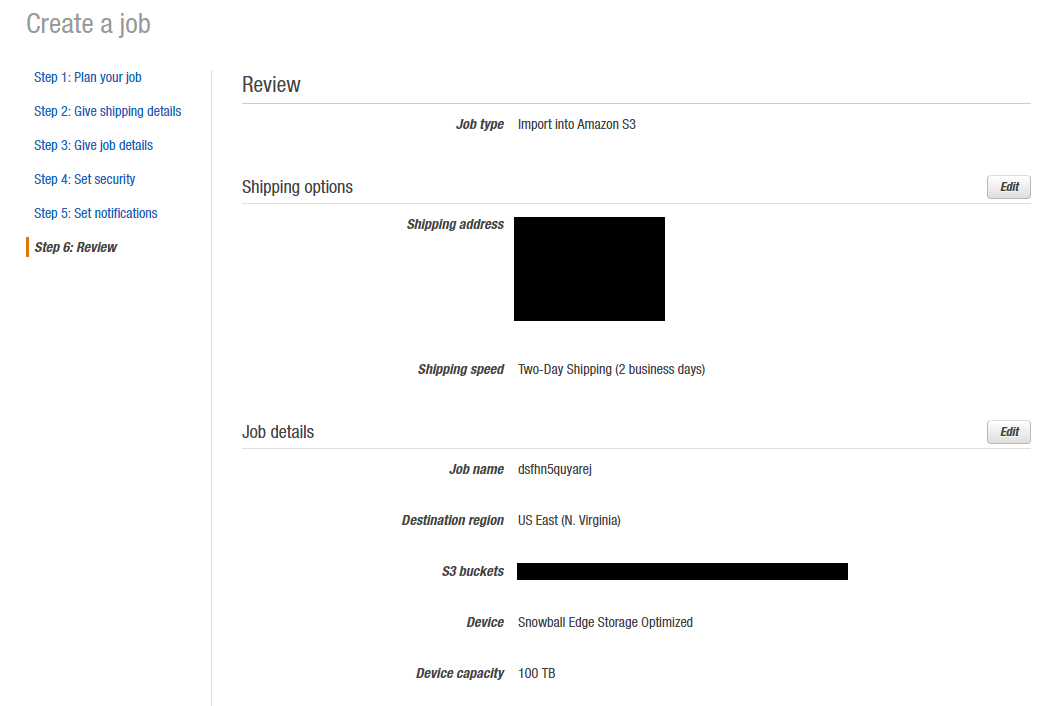
Step 6: Review
Last but not least, is the review process. Carefully examine all the information on this page, and if it is accurate, click Create Job.
Having created the job, await the box shortly. Once it arrives, you can commence backing up your data to the box.
Setting up a Snowball Edge device
Connect the powered-off box to your local network. There are various ways of doing it, be sure to read this article to learn more about connecting the Snowball to your network. Turn it on, and you’ll see a short video while the device is booting.
The Snowball Edge automatically fetches the IP address. Network settings can be set manually by choosing CONNECTION on the LCD display.
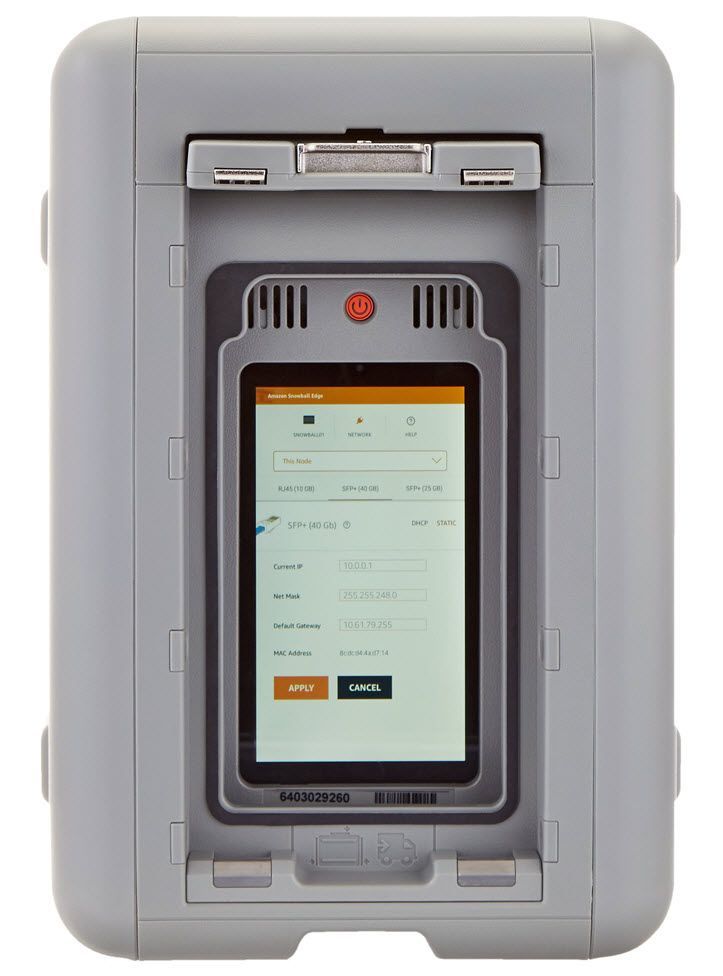
Important: don't disconnect the AWS Snowball Edge device or change its connection settings while it's in use!
You'll need it to get a set of credentials from the AWS Snowball Management Console. Then, download and install the Snowball Edge Client. Once installed, you have to unlock the AWS Snowball Edge device by running the snowballEdge unlock-device command. After that, you should get an access key and secret access key by using the snowballEdge list-access-keys and snowballEdge get-secret-access-key commands. You can find examples at the official AWS documentation.
Congratulations, you have successfully configured your Snowball Edge device and can start using it!
Make the Snowball Edge work with MSP360 Backup
Now that you have the Snowball Edge's local IP address and the access and secret keys, proceed to add your Snowball Edge as S3-compatible storage in MSP360 Backup.
Step 1: Adding Snowball Edge as S3-compatible storage account
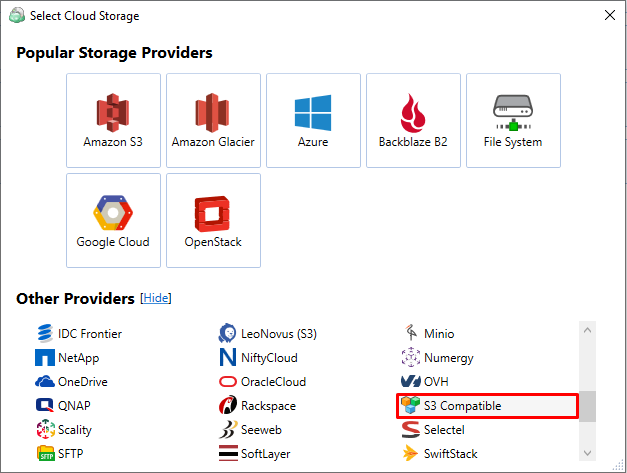
Go to the main menu and click “Add New Account”. Select S3 compatible type of storage accounts.
Enter a preferable display name, access and secret keys (the ones from the CLI output), and specify the Snowball Edge’s IP address in the Service point field.
In the Bucket name ensure that you select exactly the same bucket that you had set in the Snowball Edge import job.
Note: if you have set multiple buckets in the import job, you need to add multiple S3-compatible accounts.
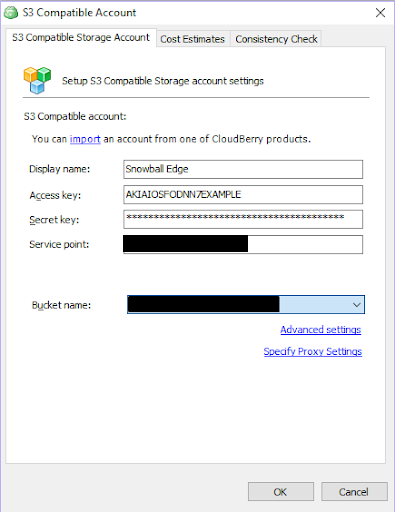
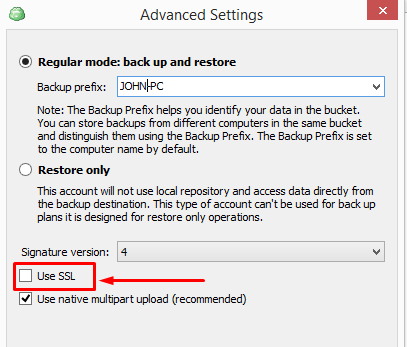
In the Advanced settings uncheck the SSL checkbox:
Once all account settings have been specified, click OK to create the account.
Step 2: Creating a backup plan to transfer data to Snowball Edge
Now proceed to create a backup files plan where you choose created S3-compatible account as a target, and choose your source data for transferring.
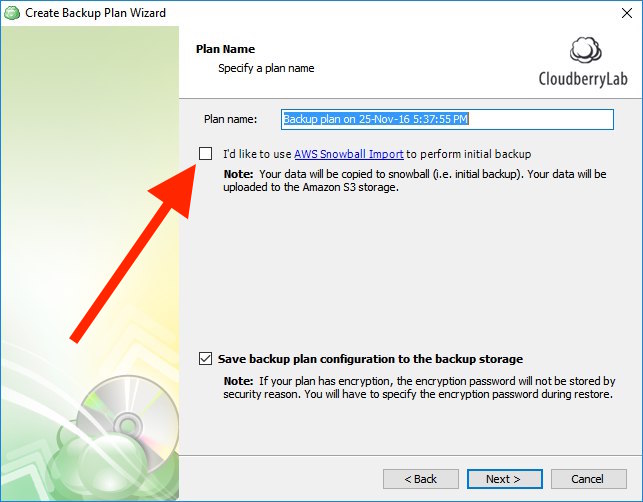
Note: Do not select the "I’d like to use AWS Snowball feature to make initial backup" check box when specifying the plan name. This option is intended exclusively for the regular AWS Snowball and is going to be deprecated.
Continue setting up the plan. When the backup plan is created, run it (manually or by schedule) and wait for its completion.
Step 3: Shipping Snowball Edge back to Amazon
Once the backup plan completed, i.e. your data has been successfully transferred to the AWS Snowball Edge, ship the box back to Amazon. Wait for them to process the data, you will receive a confirmation notification.
Step 4: Continue backups with MSP360 Backup
After receiving the confirmation from Amazon, go back to MSP360 Backup.
The first thing you need to do is to synchronize repository (a local database that MSP360 Backup uses) as MSP360 Backup knows nothing about the fact that your files have been uploaded to Amazon S3 using AWS Snowball Edge. To sync repository, go to the Tools | Options | Repository: Synchronize Repository and choose your Amazon S3 account there.
Once the repository is synced, the initial backup (via AWS Snowball Edge) can be considered complete. You will be able to see your initial backup files on the Backup Storage tab under your Amazon S3 account.
Then, to continue your incremental backups to Amazon S3, just edit your backup plan by changing the backup storage from the S3-compatible (AWS Snowball Edge) to your regular Amazon S3 account.
All future backups will be performed as usual. That's it!
Simple. Reliable.